


How to deploy ASP.NET Blazor WebAssembly to GitHub Pages

With ASP.NET Blazor WebAssembly (WASM) you can create .NET web applications that run completely inside of the browser sandbox. The publish output of a Blazor WASM project are all static files. Now that you can run .NET web applications without server-side code, you can deploy these applications to various static site hosts, such as Azure Static Web Apps and GitHub Pages.
Check out how to deploy Blazor WASM to these alternative static site hosts:
- Azure Static Web Apps using GitHub
- Azure Static Web Apps using Azure DevOps (by Dave Brock)
- AWS Amplify
- Netlify
- Cloudflare Pages
- DigitalOcean App Platform
- Heroku
- Firebase Hosting
If you prefer video content, you can learn how to manually deploy Blazor WASM to GitHub Pages and how to automate it using GitHub Actions on this YouTube video:
This walkthrough will show you how to deploy Blazor WASM to GitHub Pages using GitHub Actions. GitHub pages provides you with free hosting for static websites.
This how-to will walk you through these high-level steps:
- Create Blazor WebAssembly project
- Commit the project to a Git repository
- Create a new GitHub project and push the Git repository to GitHub
- Create a GitHub Actions Workflow
- Run GitHub Actions Workflow
Prerequisites:
- .NET Core 3.1 or up
- Git
- GitHub account
You can refer to the code used throughout this walkthrough in this GitHub repository.
Create ASP.NET Core Blazor WebAssembly project #
Run the following commands to create a new Blazor WASM project:
mkdir BlazorGitHubPagesDemo
cd BlazorGitHubPagesDemo
dotnet new blazorwasm
To give your application a try, run dotnet run and browse to the URL in the output (probably https://localhost:5001):
dotnet run
# info: Microsoft.Hosting.Lifetime[0]
#       Now listening on: https://localhost:5001
# info: Microsoft.Hosting.Lifetime[0]
#       Now listening on: http://localhost:5000
# info: Microsoft.Hosting.Lifetime[0]
#       Application started. Press Ctrl+C to shut down.
# info: Microsoft.Hosting.Lifetime[0]
#       Hosting environment: Development
# info: Microsoft.Hosting.Lifetime[0]
#       Content root path: C:\Users\niels\source\repos\BlazorGitHubPagesDemo
Optional: You can use the dotnet publish command to publish the project and verify the output:
dotnet publish -c Release
# Microsoft (R) Build Engine version 16.7.0+b89cb5fde for .NET
# Copyright (C) Microsoft Corporation. All rights reserved.
#
#   Determining projects to restore...
#   All projects are up-to-date for restore.
#   BlazorGitHubPagesDemo -> C:\Users\niels\source\repos\BlazorGitHubPagesDemo\bin\Release\netstandard2.1\BlazorGitHubPagesDemo.dll
#   BlazorGitHubPagesDemo (Blazor output) -> C:\Users\niels\source\repos\BlazorGitHubPagesDemo\bin\Release\netstandard2.1\wwwroot
#   BlazorGitHubPagesDemo -> C:\Users\niels\source\repos\BlazorGitHubPagesDemo\bin\Release\netstandard2.1\publish\
In the publish directory, you will find a web.config file and a wwwroot folder. The config file helps you host your application in IIS, but you don't need that file for static site hosts. Everything you need will be inside of the wwwroot folder. The wwwroot folder contains the index.html, CSS, JS, and DLL files necessary to run the Blazor application.
Push Blazor project to GitHub #
For this walkthrough, your application source code must be inside of a GitHub repository.
First, you need to create a local Git repository and commit your source code to the repository using these commands:
# add the gitignore file tailored for dotnet applications, this will ignore bin/obj and many other non-source code files
dotnet new gitignore
# create the git repository
git init
# track all files that are not ignore by .gitignore
git add --all
# commit all changes to the repository
git commit -m "Initial commit"
Create a new GitHub repository (instructions) and copy the commands to "push an existing repository from the command line" from the empty GitHub repository page, here's what it should looks like but with a different URL:
git remote add origin https://github.com/Swimburger/BlazorGitHubPagesDemo.git
git push -u origin master
Create a GitHub Actions Workflow #
Now that your source code has been pushed to GitHub, you'll need to create a GitHub Actions Workflow that builds your project, commits the output and pushes the code to a separate GitHub branch. GitHub Pages will use this separate branch (usually named 'gh-pages') as the static files for your site.
Start by navigating to the Actions tab in your GitHub repository and click on the link 'set up a workflow yourself':
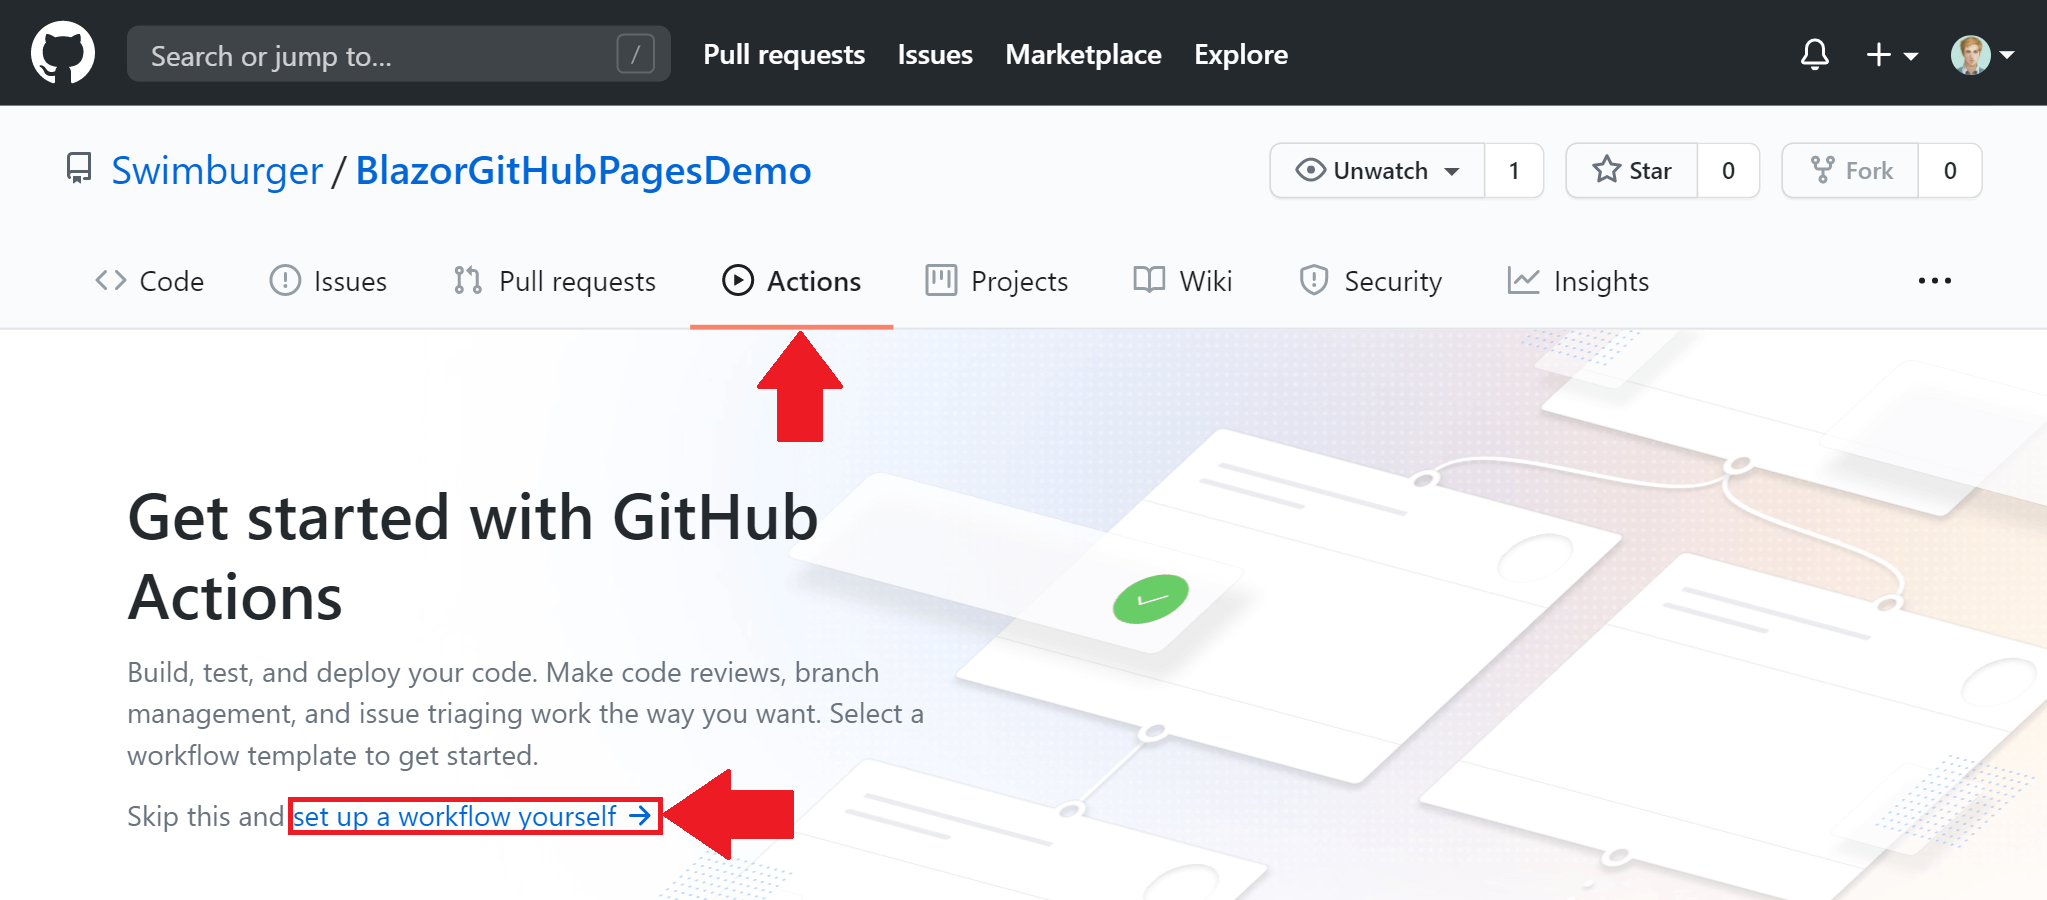
Clicking that link will take you to the 'Edit new file' page. The file that you are about to create will instruct GitHub Actions how to build and deploy your project using YAML.
These Workflow YAML files will be stored under the folder '.github/workflows/'.
Check out the GitHub Actions documentation to learn more about creating workflows.
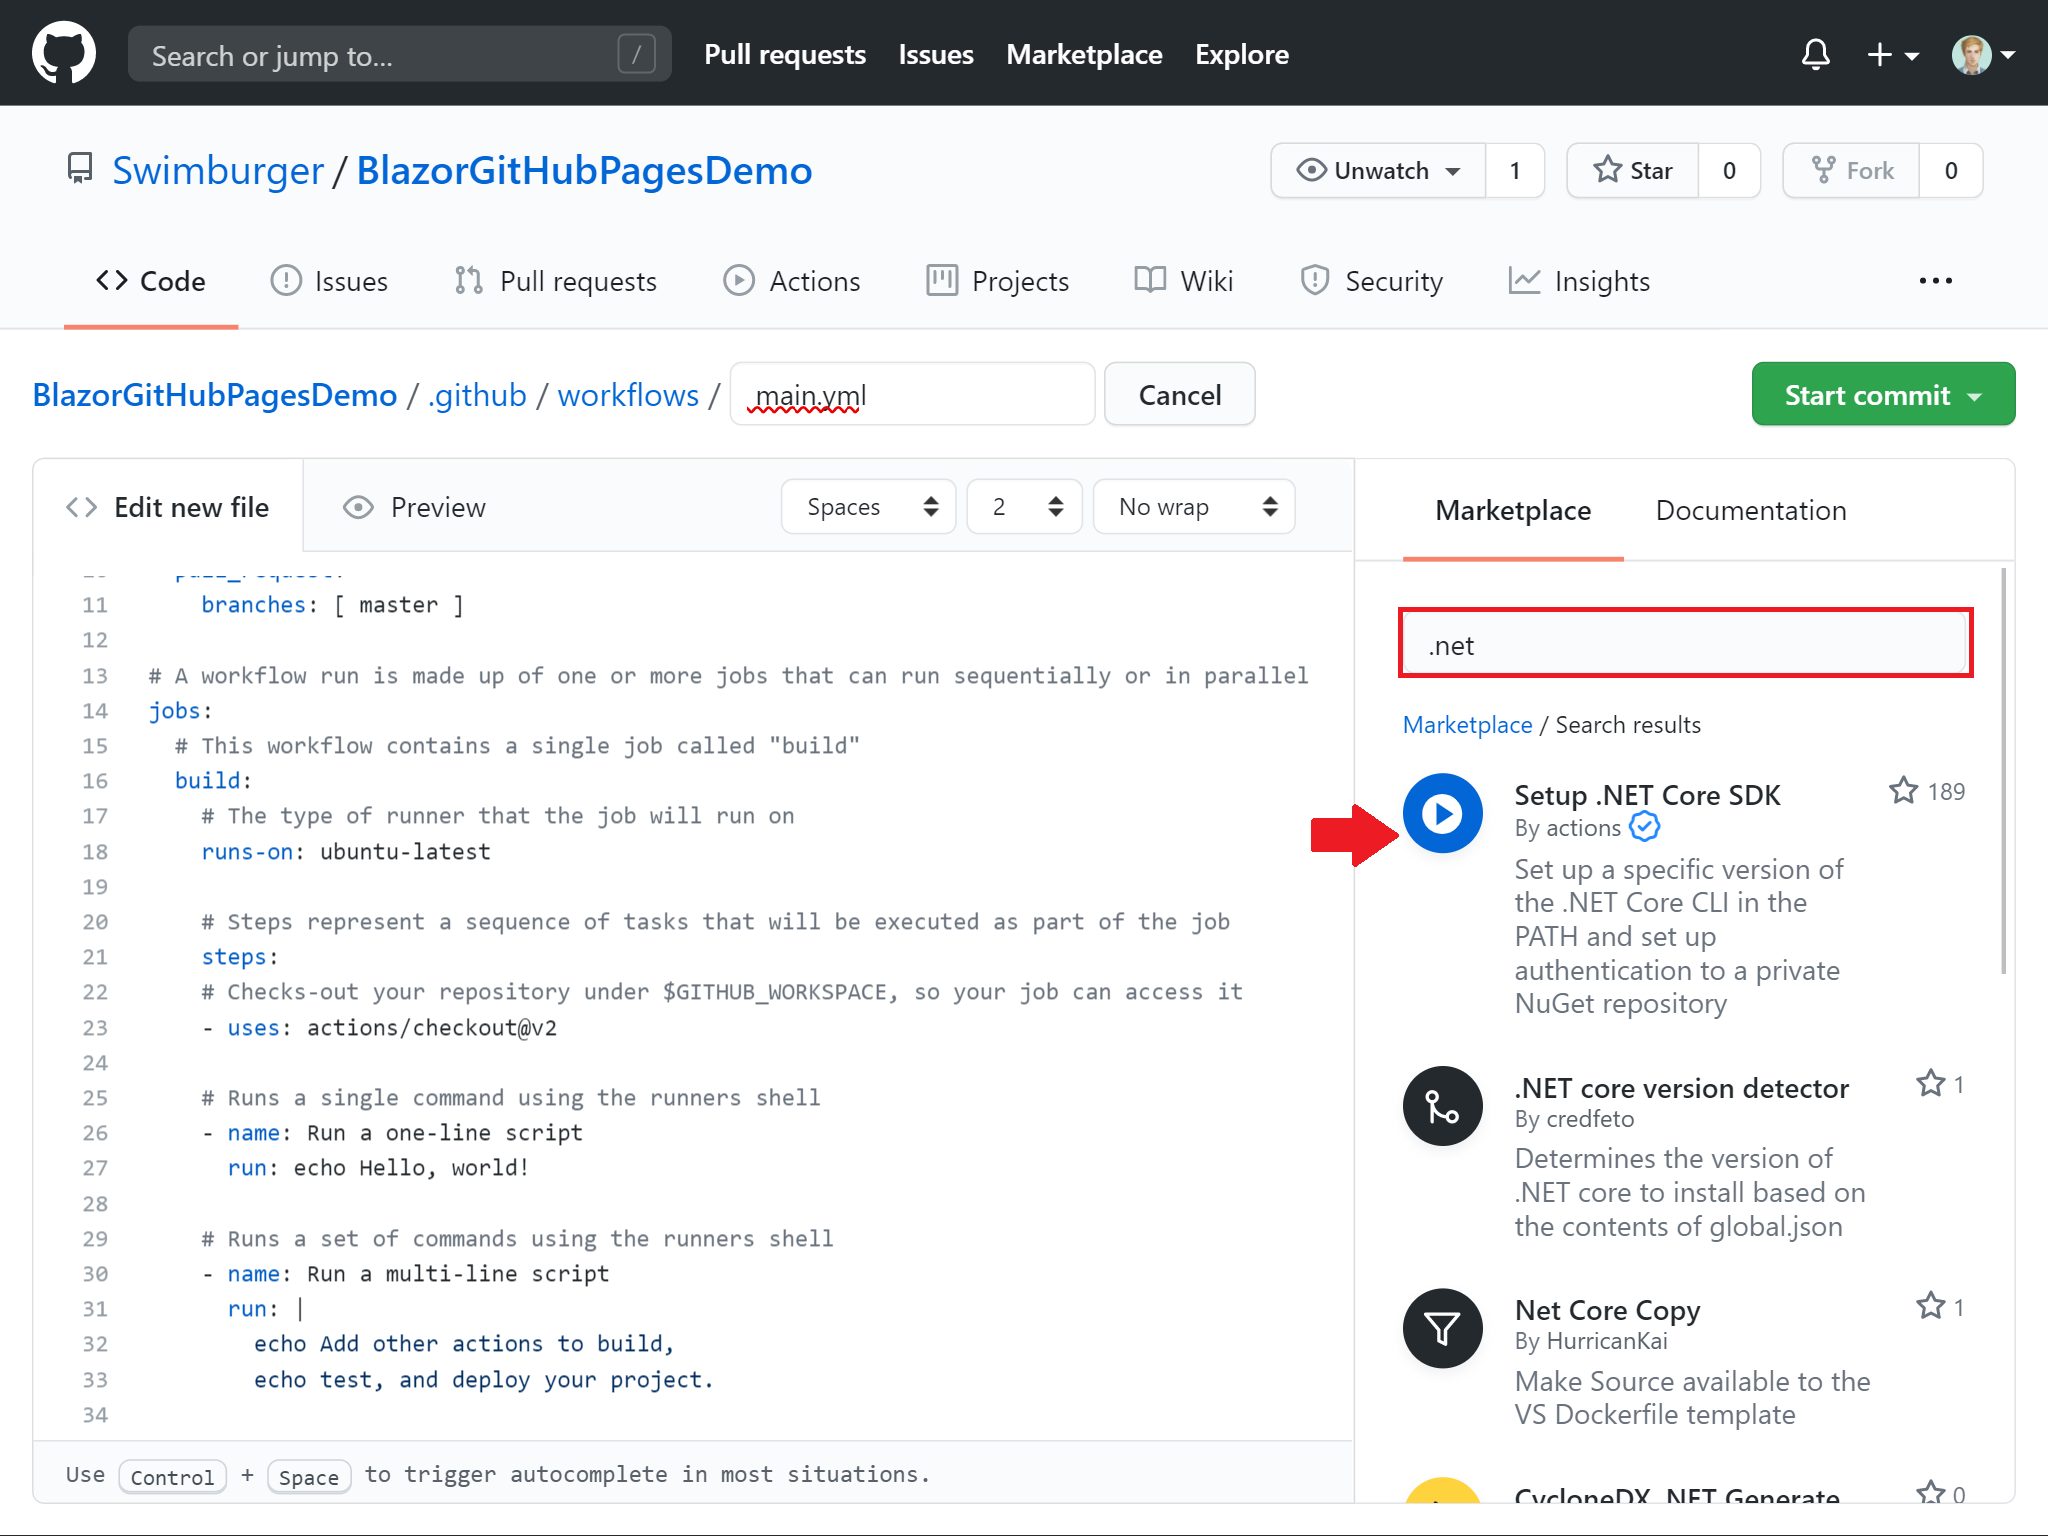
On the right side you can browse the GitHub Actions marketplace and read documentation. The GitHub Actions marketplace already has a ton of pre-made actions so you don't have reinvent the wheel. For example, when you search for '.NET', the first result is 'Setup .NET Core SDK' which is an action provided by the GitHub organization. You'll be using this action in the next steps.
Delete all code in this file so you can build your workflow from scratch.
The first line you'll need to add is the 'name' property. Give a meaningful name for your workflow:
name: Deploy to GitHub Pages
Next, you need to specify what will trigger the workflow. Add the following lines:
# Run workflow on every push to the master branch
on:
  push:
    branches: [ master ]
These lines instruct GitHub Actions to run your workflow on every git push to the master-branch.
Now, you must configure your jobs, and which image each job will run on. Give your job a meaningful name following the kebab-case naming convention such as deploy-to-github-pages.
Configure your job to run on Ubuntu by adding runs-on: ubuntu-latest, and add an empty steps property.
jobs:
  deploy-to-github-pages:
    # use ubuntu-latest image to run steps on
    runs-on: ubuntu-latest
    steps:
The first step to add will be using the checkout action provided by GitHub. Without passing any parameters to the action, the checkout action will by default perform a git checkout against your master branch.
    # uses GitHub's checkout action to checkout code form the master branch
    - uses: actions/checkout@v2
Once this action is performed, your code will be available to work with.
To build and publish the Blazor application, you'll also need to have the .NET Core SDK which doesn't come pre-installed with the Ubuntu machine. Using the setup-dotnet action provided by GitHub, you can easily install the .NET SDK on top of the Ubuntu machine:
    # sets up .NET Core SDK 3.1
    - name: Setup .NET Core SDK
      uses: actions/setup-dotnet@v1
      with:
        dotnet-version: 3.1
By passing in the dotnet-version parameter, you can specify which version of the .NET SDK you want to install.
Note: use dotnet --info on your machine to see which version of the .NET SDK you're currently using.
Now that the .NET Core SDK is installed, you can run the dotnet publish command to build and deploy your Blazor app. Using the run property, you can specify which commands to execute. Add a run property with value of your dotnet publish command.
    # publishes Blazor project to the release-folder
    - name: Publish .NET Core Project
      run: dotnet publish BlazorGitHubPagesDemo.csproj -c Release -o release --nologo
- Using the
-c(--configuration) argument, you can tell to build the project using theReleaseconfiguration. - Using the
-o(--output) argument, you can specify where to put the published files. Tell dotnet to publish the project to thereleasefolder. - The
--nologoargument will prevent some unnecessary lines from being output to the console.
Now that you have successfully published the project to the 'release' folder, you can use another very helpful action from the marketplace called 'github-pages-deploy-action'. This action will make it easy to publish your static files to GitHub Pages.
    - name: Commit wwwroot to GitHub Pages
      uses: JamesIves/github-pages-deploy-action@3.7.1
      with:
        GITHUB_TOKEN: ${{ secrets.GITHUB_TOKEN }}
        BRANCH: gh-pages
        FOLDER: release/wwwroot
- The
${{ secrets.GITHUB_TOKEN }}resolves to a token used for securely communicating with GitHub on your behalf. This token is available by default in all workflows and permissions are limited to the repository that contains your workflow. By passing it into theGITHUB_TOKENproperty, the action can use it to create and push to the 'gh-pages' branch. - The
BRANCHproperty will configure which branch the action will create and push to. Set this to 'gh-pages'. - The
FOLDERproperty will configure which folder and files will be pushed to the 'gh-pages' branch. Set this to 'release/wwwroot'. This is where the project will be published, and all the static resources are in the wwwroot-subfolder.
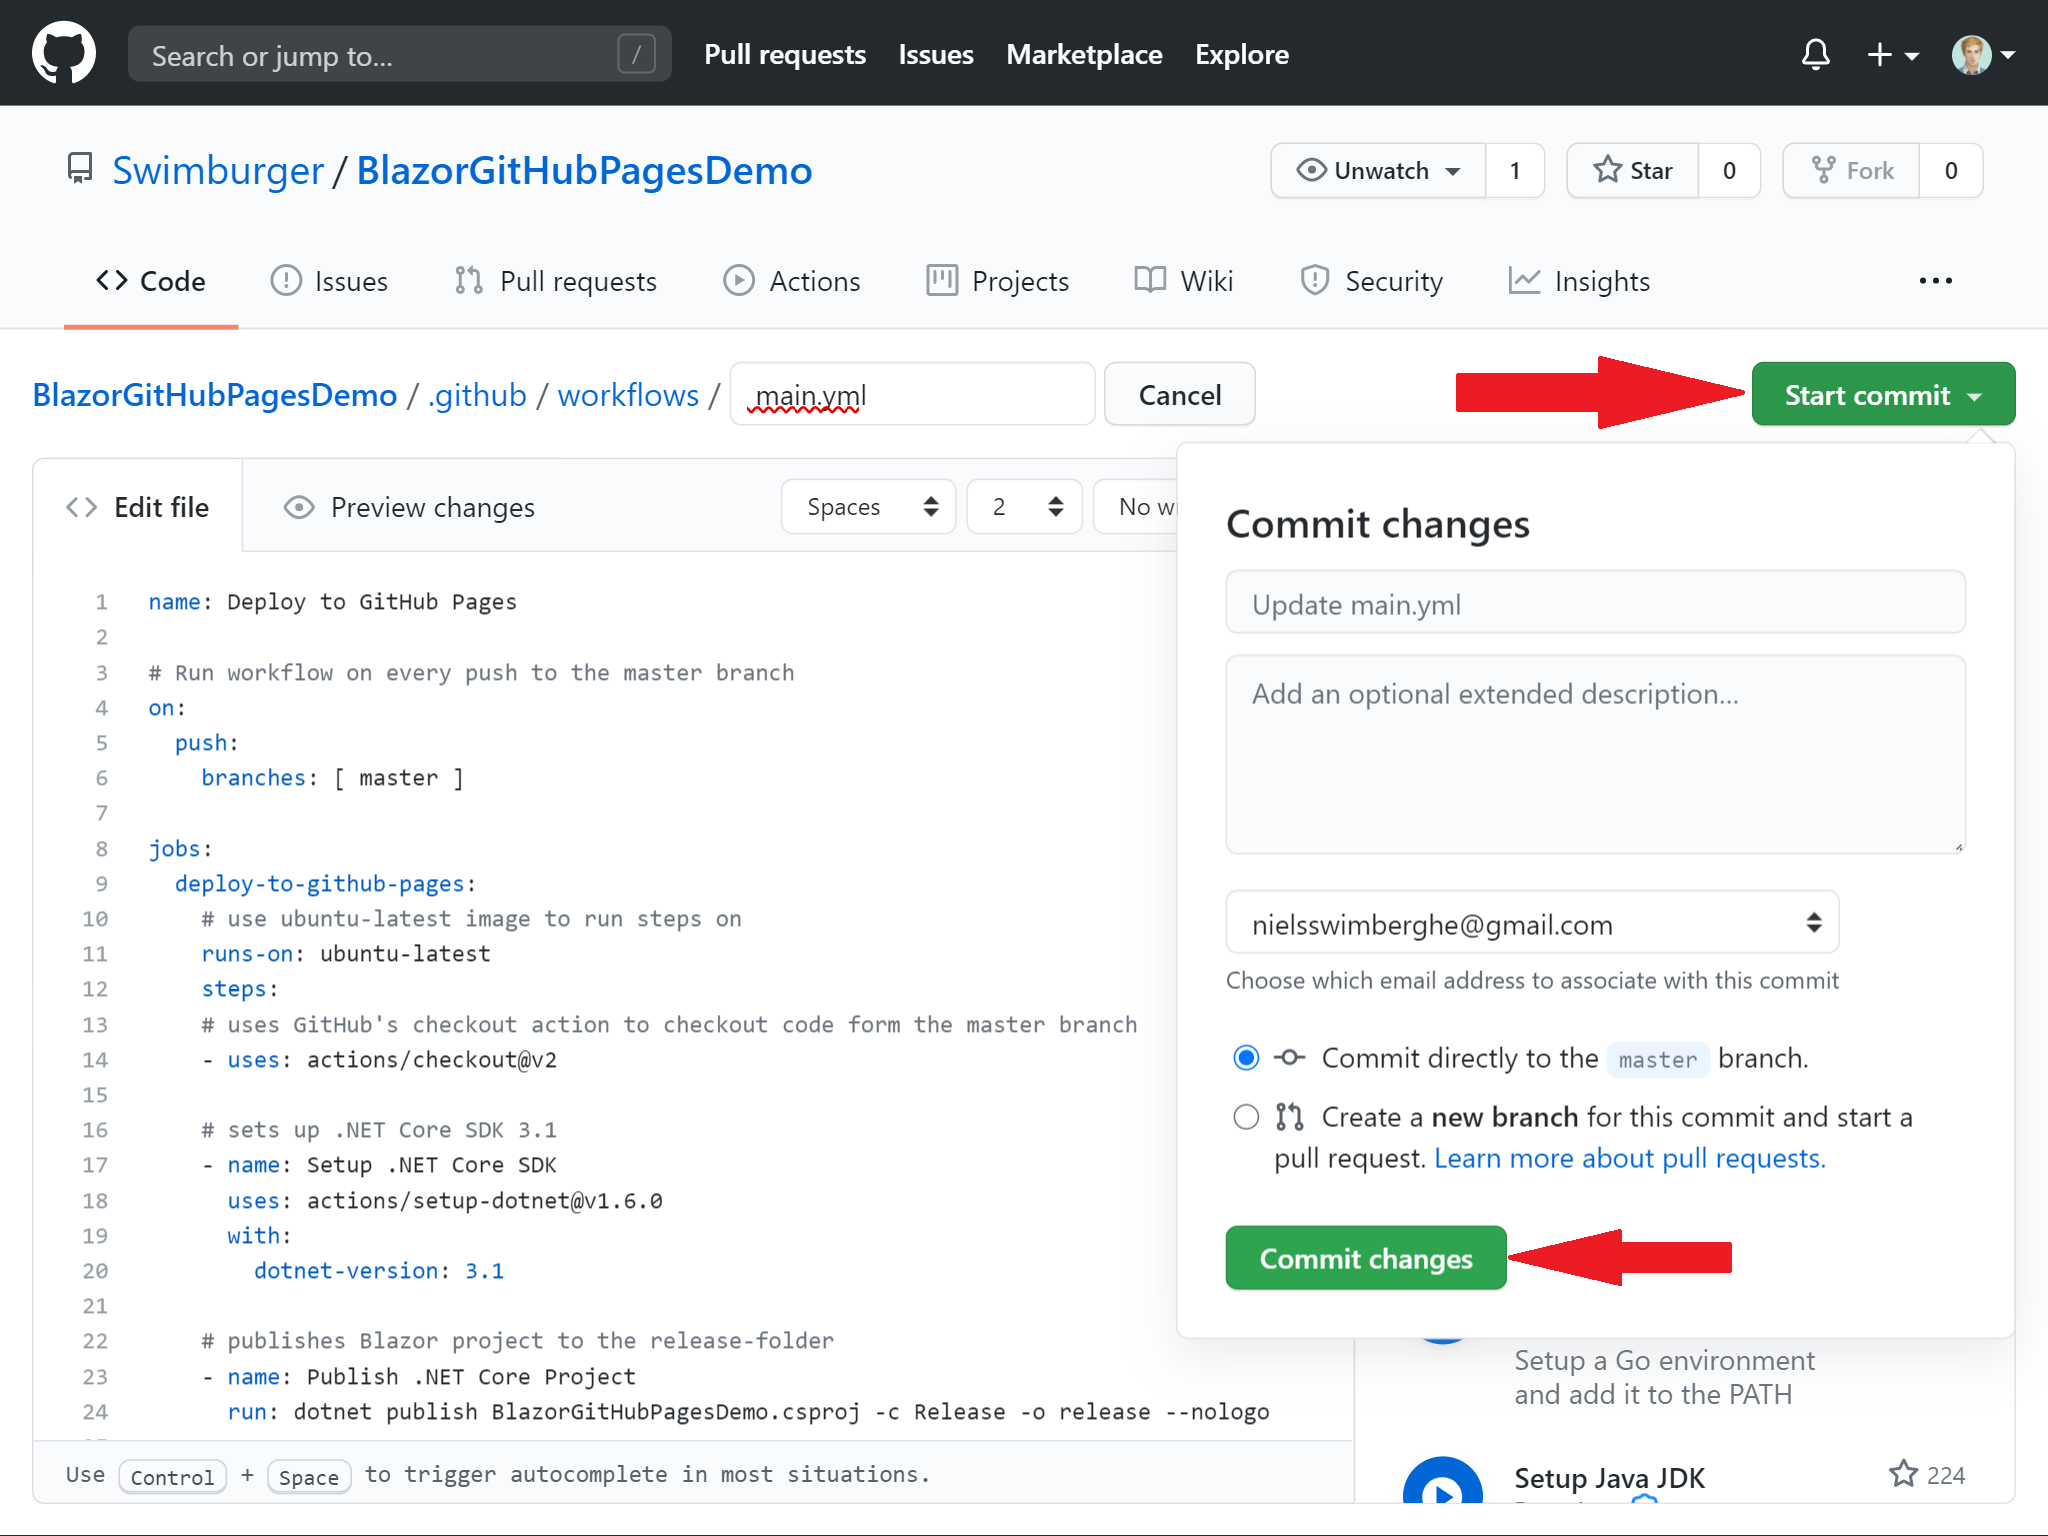
Now that all steps are in place, commit the file:
Navigate back to the GitHub Actions overview page by pressing the "Actions" tab.
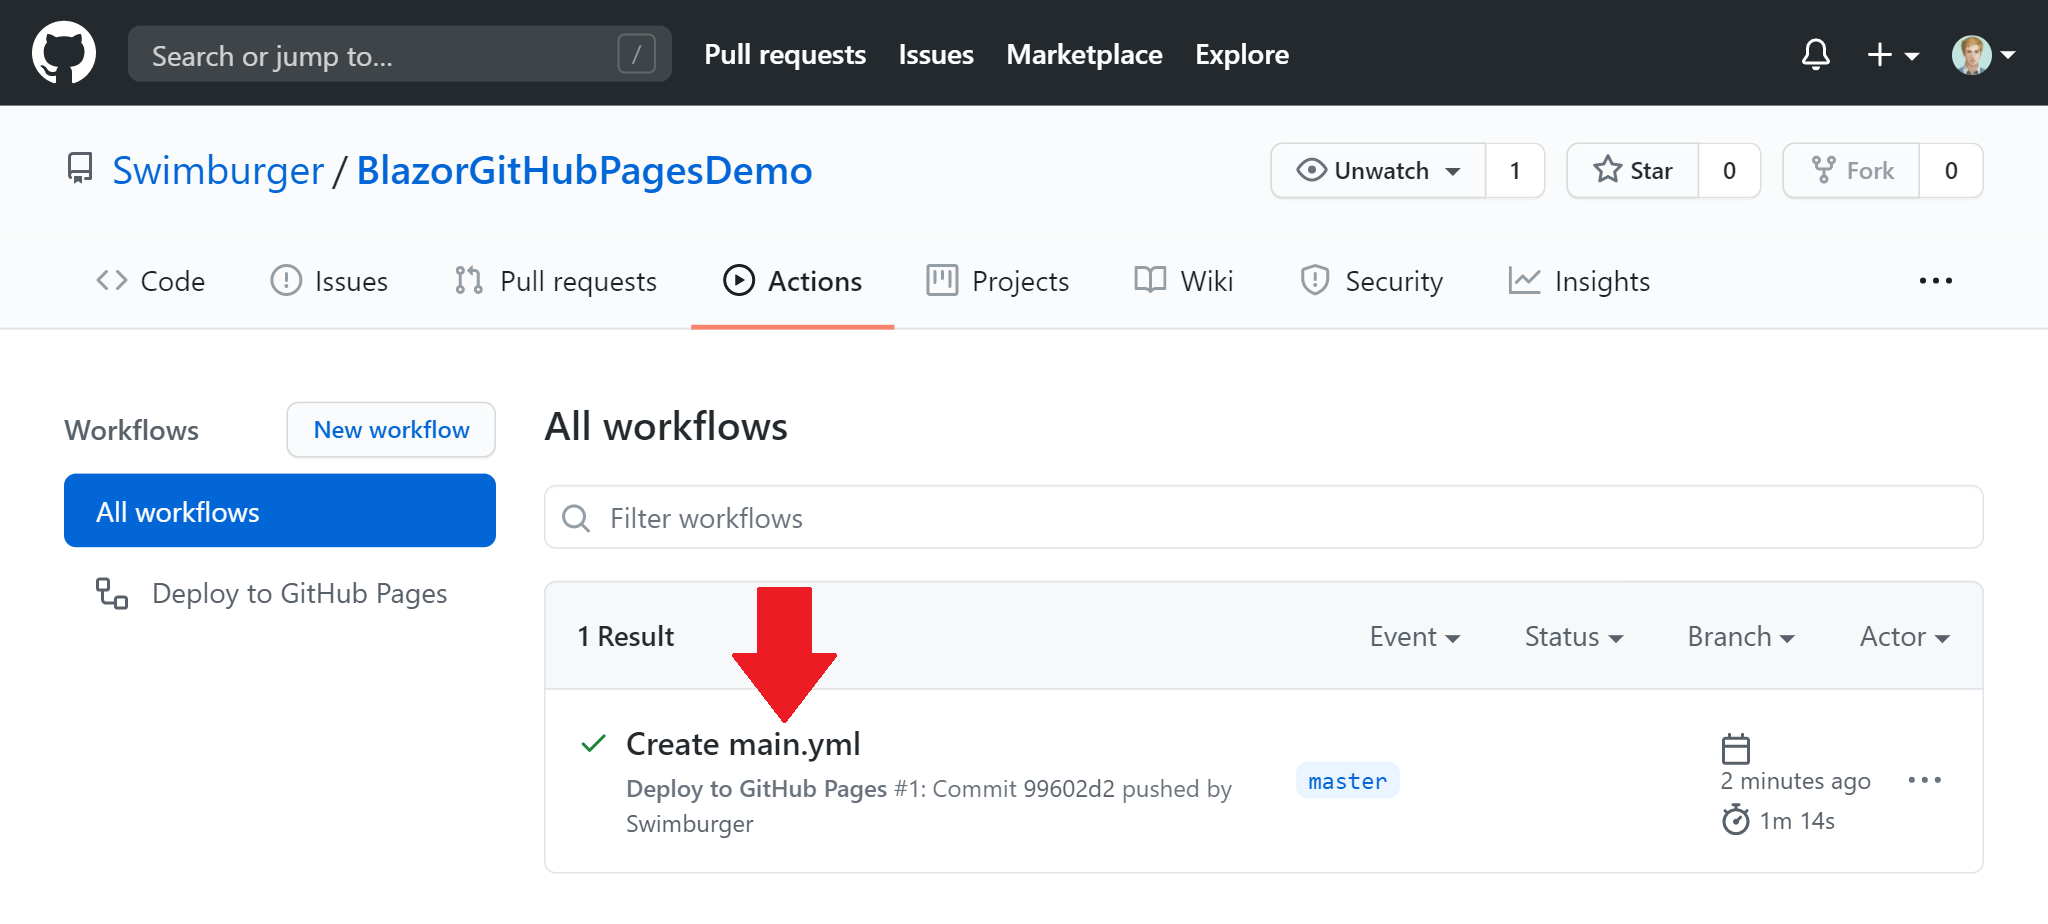
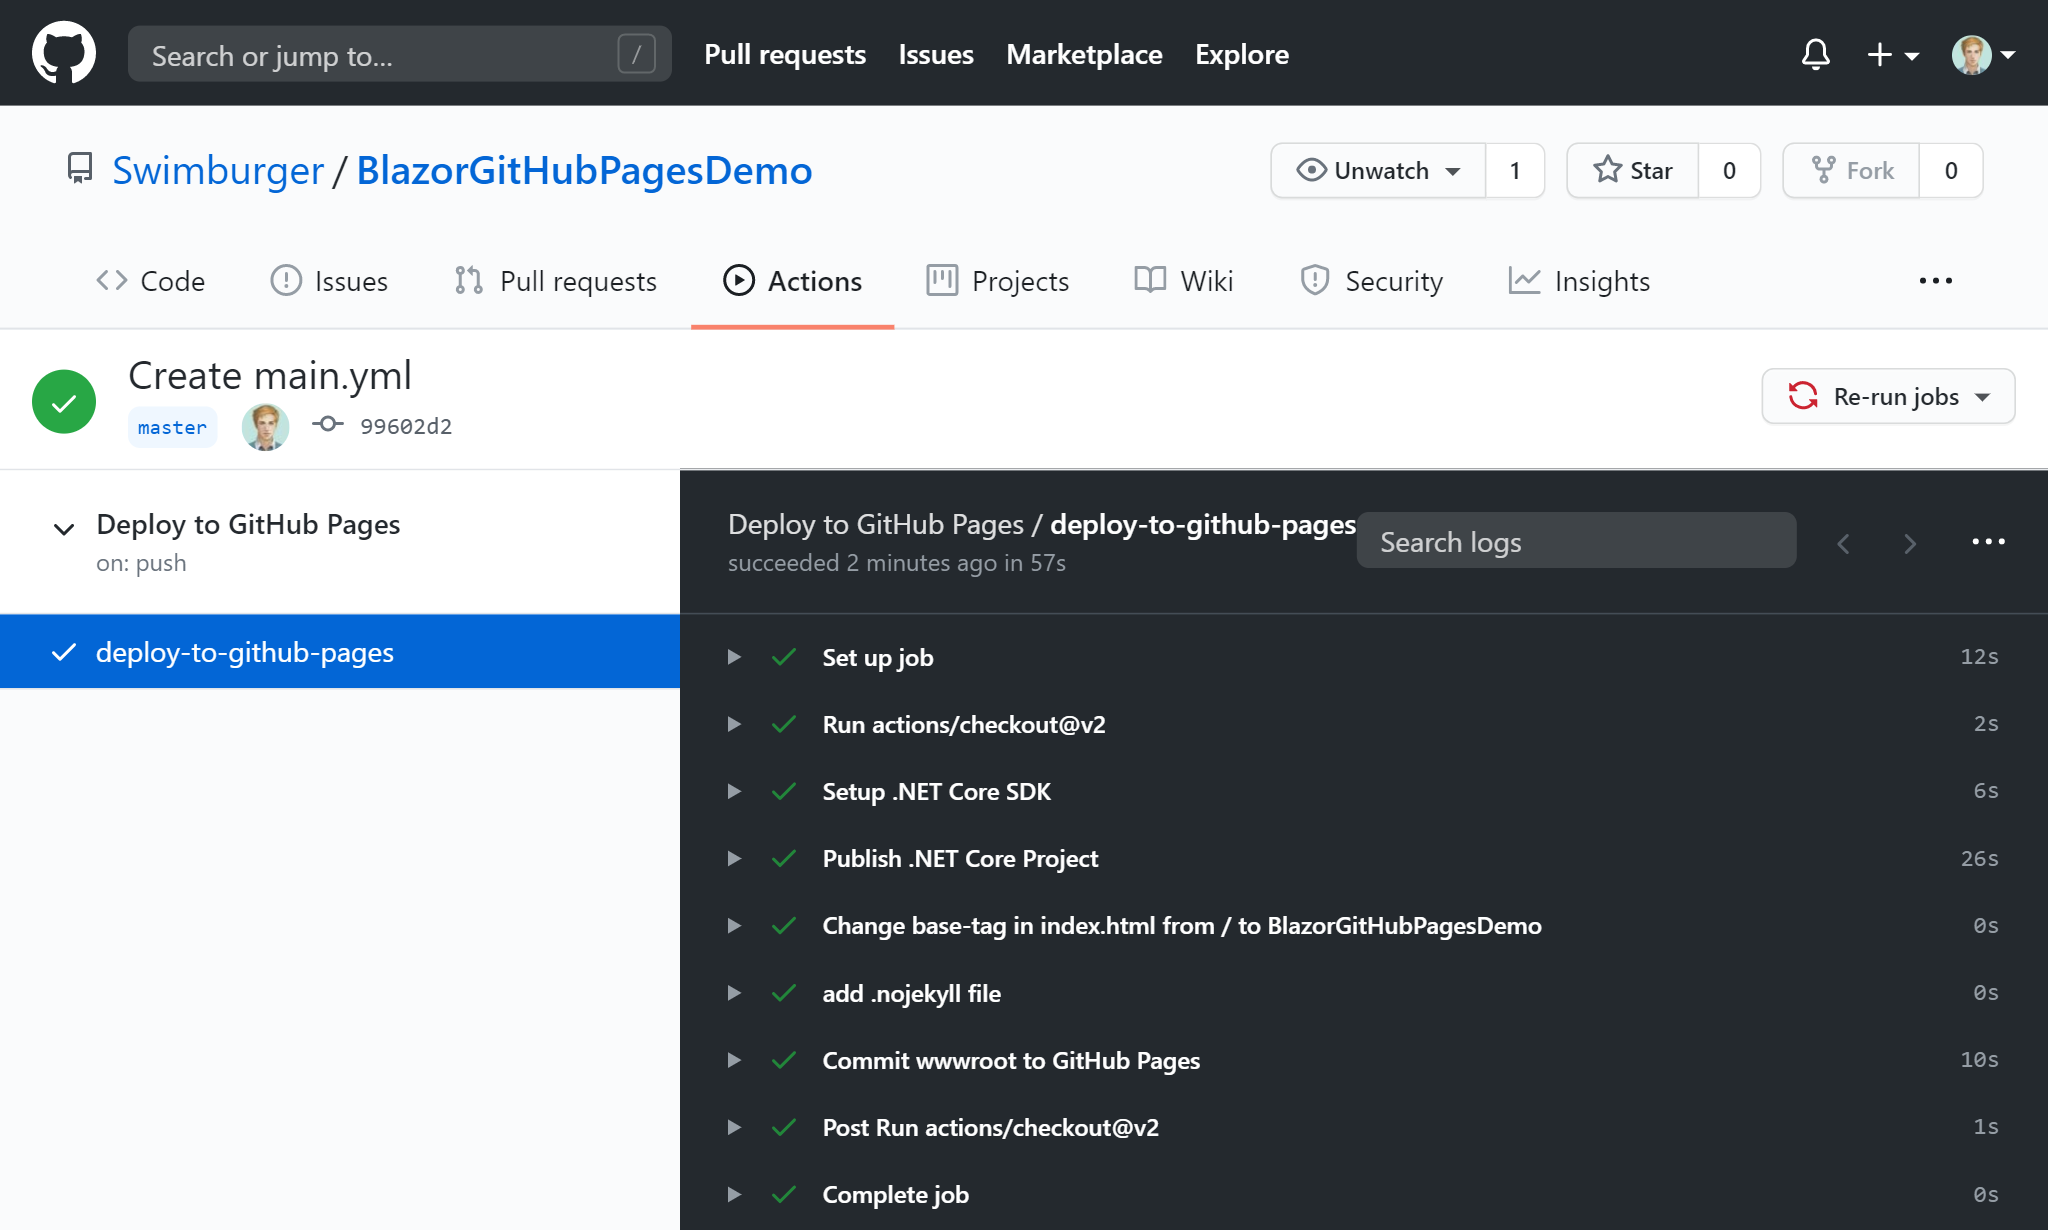
You can now find your GitHub Action Workflow and the workflow runs on this page. Click on your first run which was automatically created when you committed the workflow, and watch it publish your project to the 'gh-pages' branch:
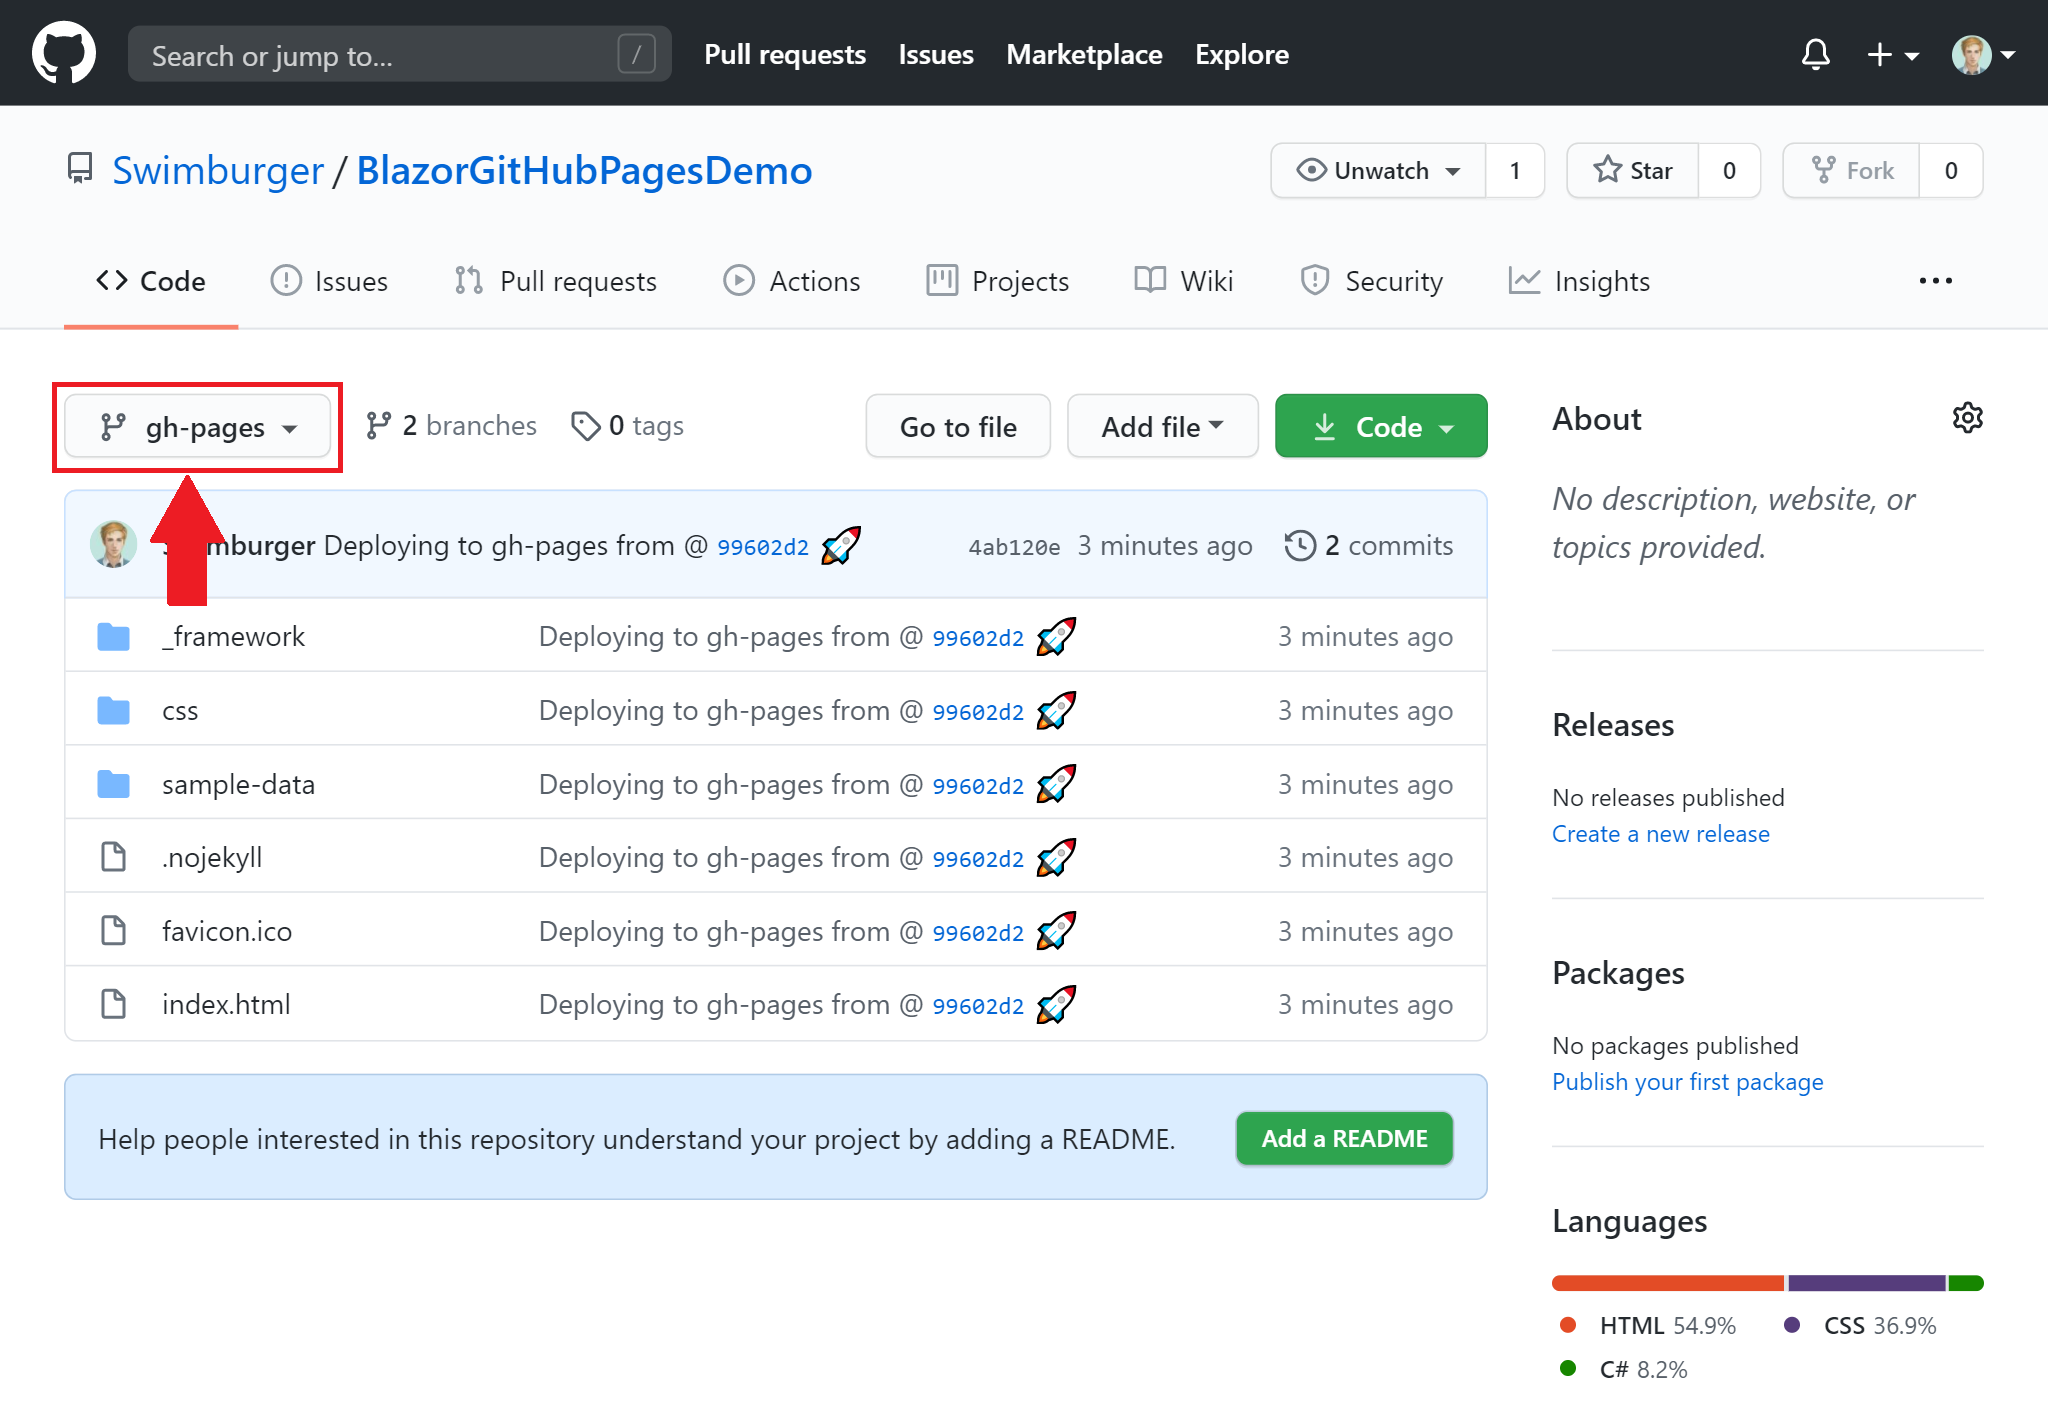
Once completed, you can see the result by navigating to the 'gh-pages' branch in your repository:
The last step is to enable GitHub pages in the repository settings. Navigate to the settings by clicking on the 'Settings' tab. Scroll down to the 'GitHub Pages' section and select the 'gh-pages' branch in the 'Source' dropdown.

After a few seconds to a minute, the GitHub Pages site should be available at '[YOUR_USERNAME].github.io/[YOUR_REPOSITORY_NAME]'.
But you'll notice that your blazor application isn't working as expected. You'll be greeted with this:
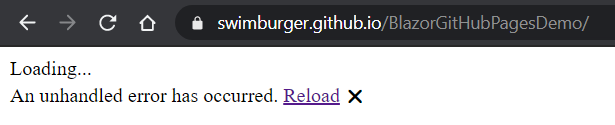
If you look at the console output, you'll find 404 errors for multiple files:
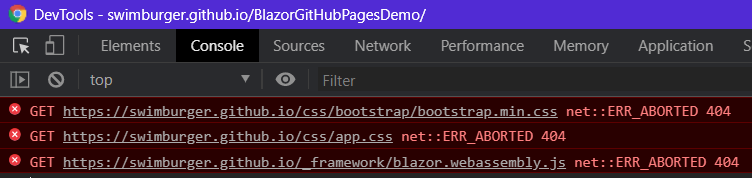
The problem is that the application is trying to fetch the resources at the root of the website (username.github.io/), not the GitHub Pages subfolder (username.github.io/repo_name).
This is because of the base-tag in the HTML head which tells the browser to resolve files relatively to the root of the server address:
<!DOCTYPE html>
<html>
<head>
    ...
    <base href="/" />
    <link href="css/bootstrap/bootstrap.min.css" rel="stylesheet" />
    <link href="css/app.css" rel="stylesheet" />
</head>
<body>
    ...
    <script src="_framework/blazor.webassembly.js"></script>
</body>
</html>
To solve this, you need to update the base-tag to <base href="https://swimburger.net/your_repo_name/" />.
If you were to do this directly inside of the master-branch, that would break the application for local development. So instead of that, you can run a command inside of your workflow to automatically replace the base tag.
Navigate to the workflow YAML file in the master-branch and add the following section right after the dotnet publish action:
    # changes the base-tag in index.html from '/' to 'BlazorGitHubPagesDemo' to match GitHub Pages repository subdirectory
    - name: Change base-tag in index.html from / to BlazorGitHubPagesDemo
      run: sed -i 's/<base href="\/" \/>/<base href="\/BlazorGitHubPagesDemo\/" \/>/g' release/wwwroot/index.html
Make sure to replace 'BlazorGitHubPagesDemo' with your repository name. This command will update the file in place, replacing the default base-tag with the subfolder-version. Commit this change and verify the result.
The favicon.ico and CSS-files are now loading successfully, but unfortunately as you solved one issue, another popped up:

GitHub Pages by default expects you to use the Jekyll static site generator. As part of this default, GitHub pages will not serve any files or folder starting with and underscore. As it happens, Blazor does use underscores in the '_framework' folder. Without these files, the Blazor application will not function.
Luckily, GitHub Pages will turn off this behavior if you add an empty '.nojekyll' file at the root of the 'gh-pages' branch.
You could create an empty '.nojekyll' file in the 'wwwroot' folder in the master branch or you could add another command to the workflow to create this file for you. This how-to will do the latter.
Navigate back to the workflow YAML file and add the following step before the GitHub Pages deploy step:
    # add .nojekyll file to tell GitHub pages to not treat this as a Jekyll project. (Allow files and folders starting with an underscore)
    - name: Add .nojekyll file
      run: touch release/wwwroot/.nojekyll
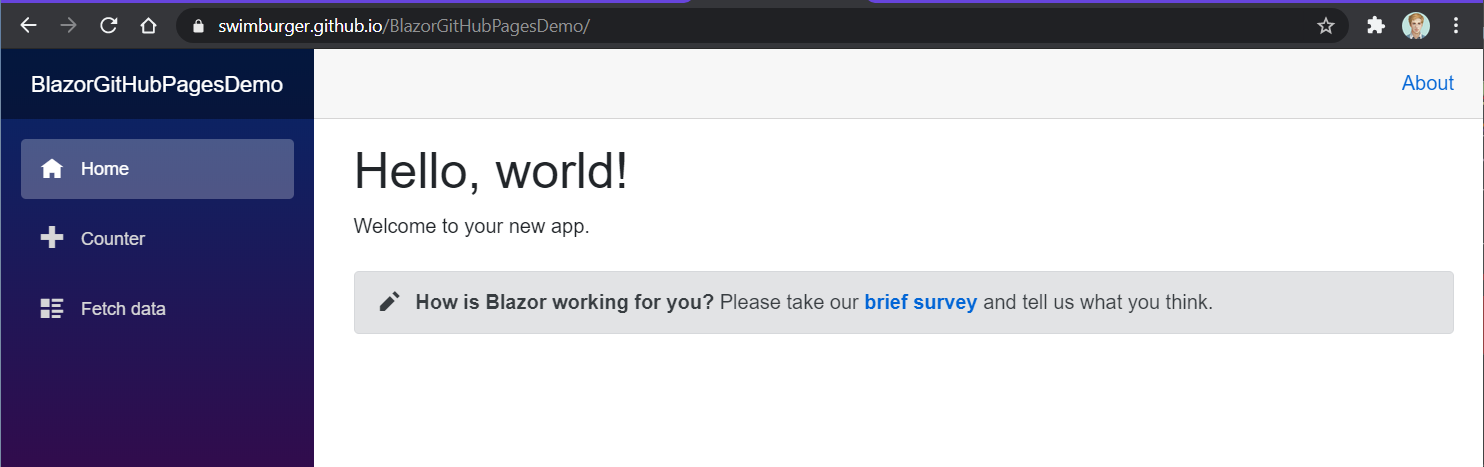
Commit your changes and once the workflow run finishes, your Blazor application is finally fully functional:
If you're using the PWA feature in Blazor WebAssembly, you will also run into an integrity checking issue. Read this follow-up post on how to resolve that issue for GitHub Pages.
Fixing 404 #
By default, GitHub pages will show its GitHub branded 404 page. This may not be an issue for you, but in case it is, you have two options.
- Create your own
404.htmlin thewwwrootfolder and commit it to your repository. Once deployed, GitHub will automatically start using that file for any unknown URL's under your GitHub Pages site. - Alternatively, as part of your GitHub Actions Workflow, you can copy the
index.htmlfile as404.htmland then publish it to thegh-pagesbranch. Blazor routing will take effect and render the defaultNotFoundsection fromApp.razor:
<Router AppAssembly="@typeof(Program).Assembly">
    <Found Context="routeData">
        <RouteView RouteData="@routeData" DefaultLayout="@typeof(MainLayout)" />
    </Found>
    <NotFound>
        <LayoutView Layout="@typeof(MainLayout)">
            <p>Sorry, there's nothing at this address.</p>
        </LayoutView>
    </NotFound>
</Router>
For this tutorial, follow the second approach. Add the following step to your workflow before the 'Add .nojekyll file' step:
    # copy index.html to 404.html to serve the same file when a file is not found
    - name: copy index.html to 404.html
      run: cp release/wwwroot/index.html release/wwwroot/404.html
This approach was suggested by ndsvw on GitHub. Thank you ndsvw!
Even though GitHub resolves unknown paths to your new 404.html file, the HTTP response from GitHub Page still has the status code 404. Search engines will not index pages with HTTP status 404. You can resolve this by pre-rendering your Blazor WASM application as explained here: "Pre-render Blazor WebAssembly at build time to optimize for search engines"
Summary #
Blazor WebAssembly can be served as static files. These files can be hosted in static hosting sites such as GitHub Pages. Using GitHub Actions you can create a workflow to automatically deploy the Blazor application to GitHub pages. Before publishing the files to GitHub pages, you must update the base-tag to point to the correct subfolder. You also must add a '.nojekyll' file to ensure files and folders starting with an underscore will be served by GitHub Pages successfully.
Here's the entire workflow YAML file:
name: Deploy to GitHub Pages

# Run workflow on every push to the master branch
on:
  push:
    branches: [ master ]

jobs:
  deploy-to-github-pages:
    # use ubuntu-latest image to run steps on
    runs-on: ubuntu-latest
    steps:
    # uses GitHub's checkout action to checkout code form the master branch
    - uses: actions/checkout@v2

    # sets up .NET Core SDK 3.1
    - name: Setup .NET Core SDK
      uses: actions/setup-dotnet@v1
      with:
        dotnet-version: 3.1

    # publishes Blazor project to the release-folder
    - name: Publish .NET Core Project
      run: dotnet publish BlazorGitHubPagesDemo.csproj -c Release -o release --nologo

    # changes the base-tag in index.html from '/' to 'BlazorGitHubPagesDemo' to match GitHub Pages repository subdirectory
    - name: Change base-tag in index.html from / to BlazorGitHubPagesDemo
      run: sed -i 's/<base href="\/" \/>/<base href="\/BlazorGitHubPagesDemo\/" \/>/g' release/wwwroot/index.html

    # copy index.html to 404.html to serve the same file when a file is not found
    - name: copy index.html to 404.html
      run: cp release/wwwroot/index.html release/wwwroot/404.html

    # add .nojekyll file to tell GitHub pages to not treat this as a Jekyll project. (Allow files and folders starting with an underscore)
    - name: Add .nojekyll file
      run: touch release/wwwroot/.nojekyll

    - name: Commit wwwroot to GitHub Pages
      uses: JamesIves/github-pages-deploy-action@3.7.1
      with:
        GITHUB_TOKEN: ${{ secrets.GITHUB_TOKEN }}
        BRANCH: gh-pages
        FOLDER: release/wwwroot

