


Setting up Cloudflare Full Universal SSL/TLS/HTTPS with an Azure App Services

Cloudflare has many services to help speed up your web properties, scale globally, secure your site, and much more. One of those services provides a free certificate for your site to offer a secure connection to your visitors. This Cloudflare service is called Universal SSL/TLS. Ensuring that your site is served over HTTPS is an absolute must. If you’re not convinced, give this site a read: doesmysiteneedhttps.com.
In this post we’ll walk through setting up Cloudflare Full (strict) SSL/TLS for a Windows Azure Web App.
Cloudflare Universal SSL/TLS #
Before enabling Universal SSL/TLS, your site will have to be configured to use Cloudflare’s DNS. When your domain name resolves to Cloudflare’s DNS servers, Cloudflare will sit in between your web server and your visitors. This way Cloudflare can modify requests and responses, basically acting as a “man in the middle” or proxy. Instead of the malicious “man in the middle” which puts your privacy at risk, Cloudflare will enrich your site with their services without any code changes required on your end.
After setting up Universal SSL/TLS, Cloudflare will provide the necessary certificates to offer secure connections. You can configure Universal SSL/TLS in 3 different modes (excluding the default off):
- Flexible
- Full
- Full (Strict)
When using the flexible option, the data will be securely transferred between the client and the Cloudflare servers. Though when Cloudflare passes on the request to your server, this still occurs over an insecure HTTP connection. This configuration would certainly check off the box for Google to consider your website to use “HTTPS” and rank you accordingly, but it doesn’t provide you with full end-to-end encrypted traffic. While this would prevent someone from sniffing and altering the traffic on an insecure coffee shop WIFI, the traffic could still be sniffed between Cloudflare and your server.
If you want traffic to also be encrypted between Cloudflare and your server, you’ll need to use the Full or Full (strict) option. While “flexible” requires little to no configuration, “full” will require some more effort to setup. In order for the traffic between Cloudflare and your server to be encrypted, you’ll need to install a TLS certificate on your server. When using the “Full” option, the certificate will be used to setup a secure connection, but the certificate won’t be validated by Cloudflare. This means a self-signed or a certificate that doesn’t match your domain will work fine. For the “Full (strict)” option, you’ll need to have an TLS certificate installed that matches your domain and is trusted by a Certificate Authority (CA).
One alternative to this is to install an “Origin Certificate” provided by Cloudflare, which they will trust as well. We’ll be using Cloudflare’s “Origin Certificate” approach to setup Full (strict).
Setting up Full (strict) Universal SSL/TLS with Azure App Services #
Prerequisites #
- Your Azure App Service uses Cloudflare DNS
- Your Azure App Service pricing tier needs to support IP SSL Binding
(minimum pricing tier to support IP SSL is S1) - OpenSSL installed on client machine
Note: These steps below have been taken using Windows OS and the Azure App Service is also using Windows.
Requesting Cloudflare Origin Certificate #
At this point I assume you already have a Cloudflare account, and have your site linked up to proxy your site through their network.
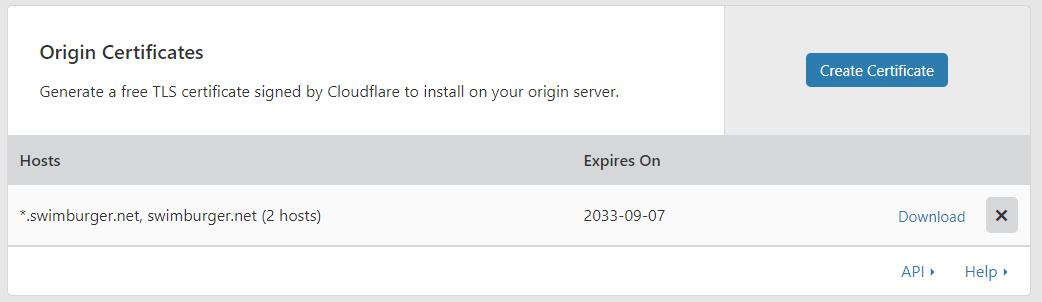
Head over to the “Crypto” tab and find the “Origin Certificates” section. Click the “Create Certificate” button.
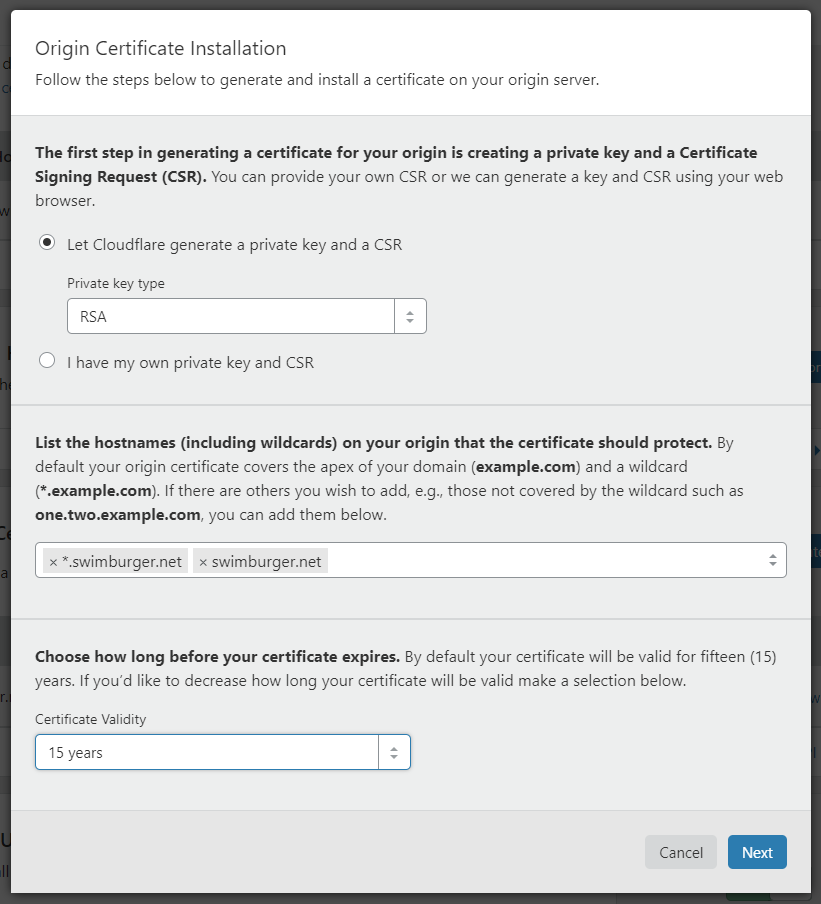
In our case, we’ll let Cloudflare generate the necessary keys (RSA). Next, we’ll need to list the domains we want to support. You can use wildcards in your domain names as you can see below.
Hit next, and copy over the certificate (domain-name.pem) and private key (domain-name.key) to your local machine. Ensure that both files are encoded using ANSI. You can use notepad to save the files with ANSI encoding if necessary.
To be able to setup SSL/TLS in Azure App Service, we’ll need a pfx-certificate. Use the following command to create the required pfx-file. You will be prompted to enter a password which you’ll also need to use when uploading the pfx to Azure.
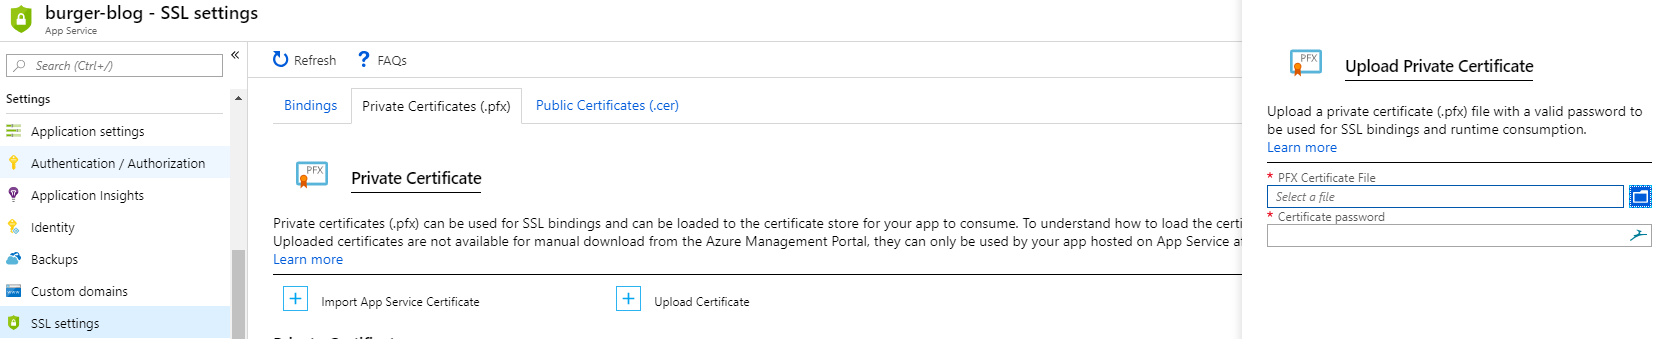
Now that we have our certificate, go to your Azure App Service and navigate to “Settings > SSL Settings > Private Certificates (.pfx)”.
Click on the “Upload Certificate” button, upload your PFX file and enter the password you used to create the PFX cert.
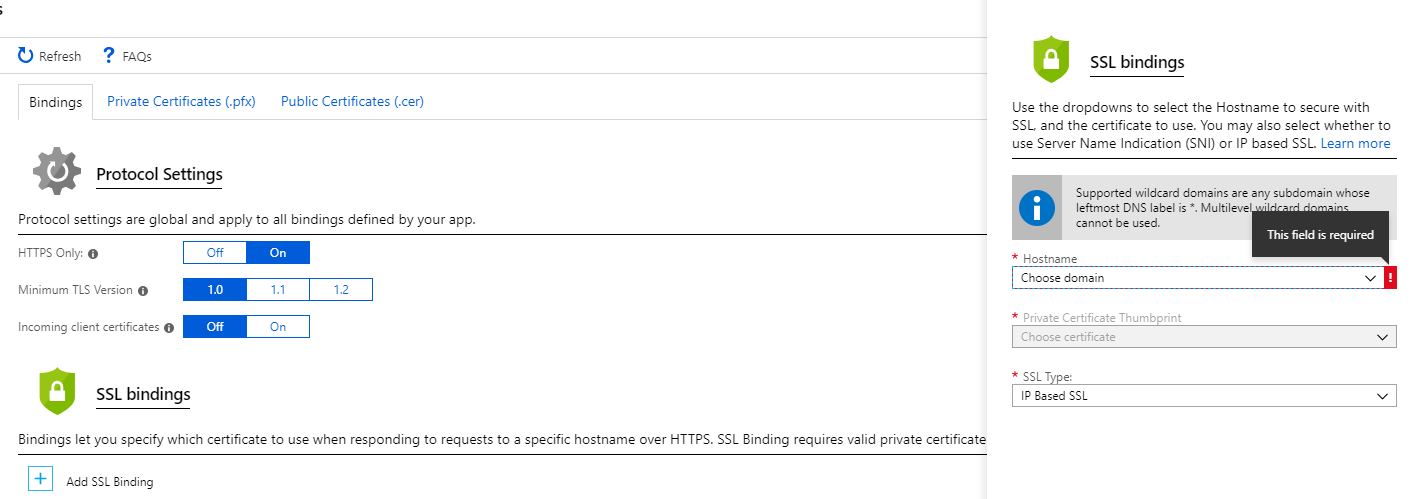
Now switch back to the “Bindings” tab and click on the “Add SSL Binding” button. Create an IP Based SSL binding for your domain and subdomains, and select the Cloudflare certificate we uploaded earlier.
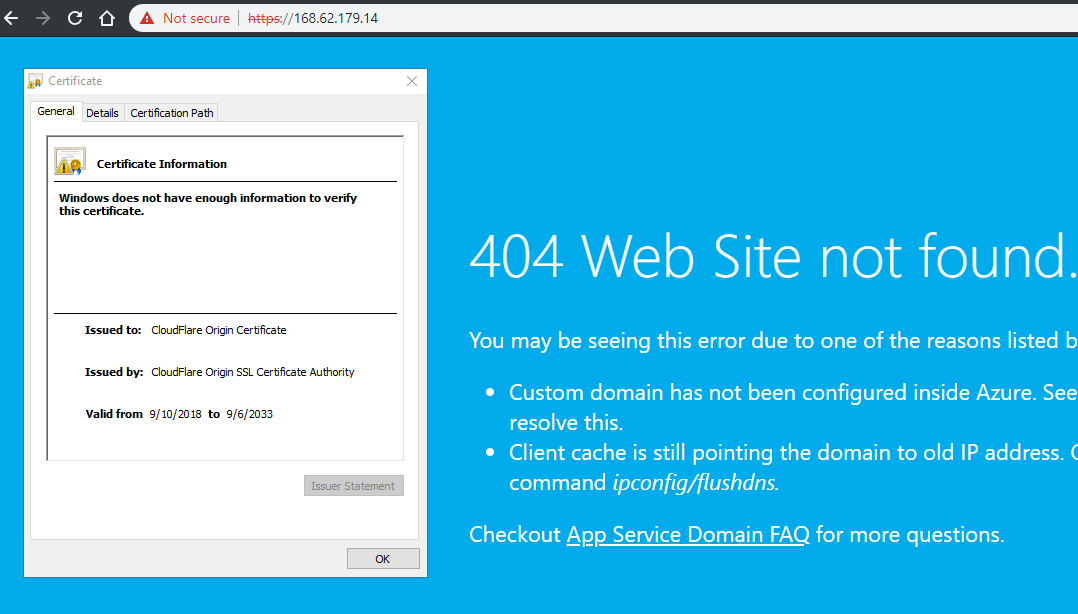
When you browse to the IP address of your Azure App Service using HTTPS, you may be alarmed to see the browser warning you, but this is fine. Inspect the certificate details, and you’ll see Azure is serving the Cloudflare origin certificate which is what we need.
The last step is to go back to Cloudflare and switch the SSL/TLS settings to Strict (Full). Keep in mind that it can take some time (up to 24 hours) for Cloudflare to issue the SSL/TLS certificate. After Cloudflare is done issuing the new certificate, your site should be fully encrypted from client, to Cloudflare, to your server and back.

