


How to add Hangfire to DNN
DNN already has an excellent built-in scheduler you can use to schedule tasks. But you may be more familiar with and prefer Hangfire for running background jobs. These instruction will walk you through configuring Hangfire in with DNN.
Prerequisites:
- Installed DNN Platform 9.6.2 (older versions should work too)
- Visual Studio 2019 (older versions will work but look different)
High level steps:
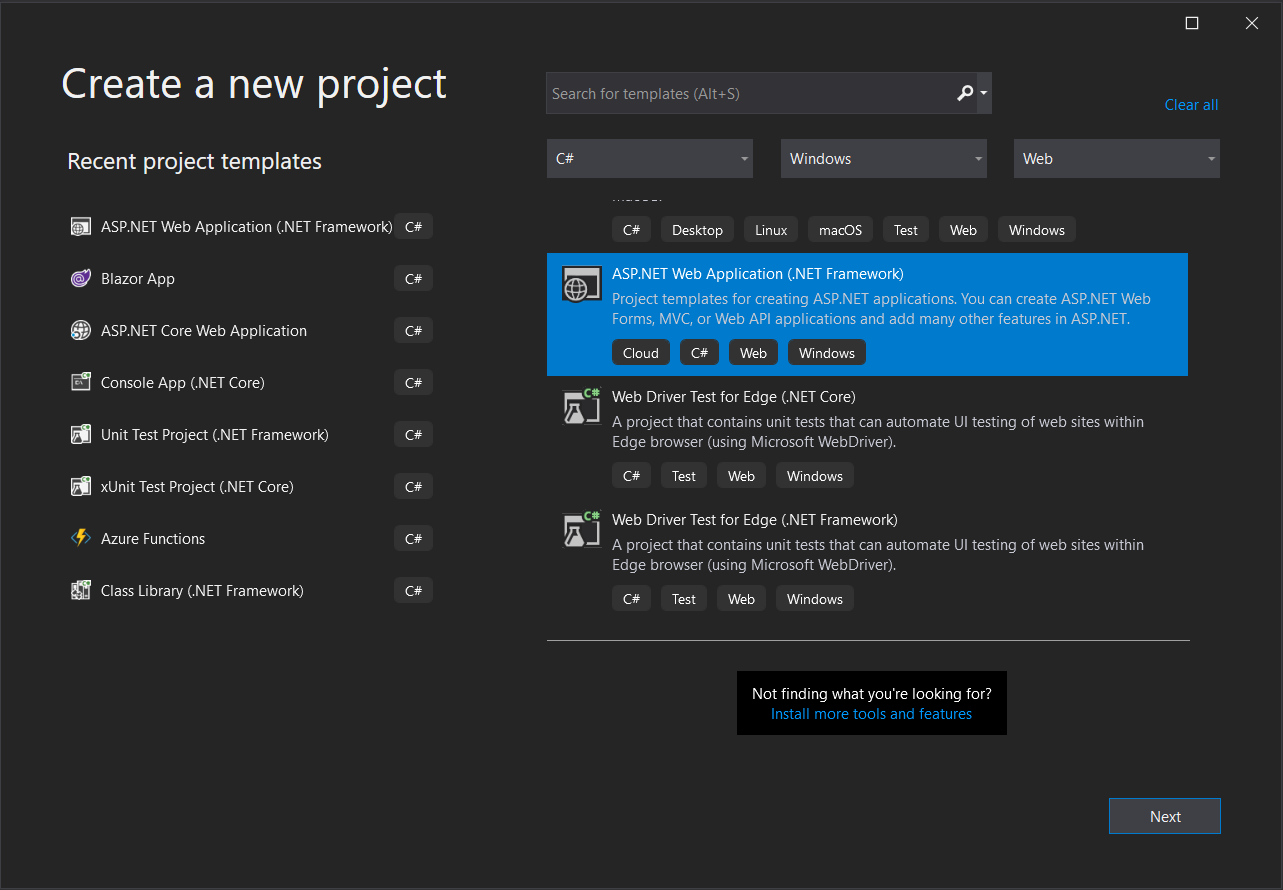
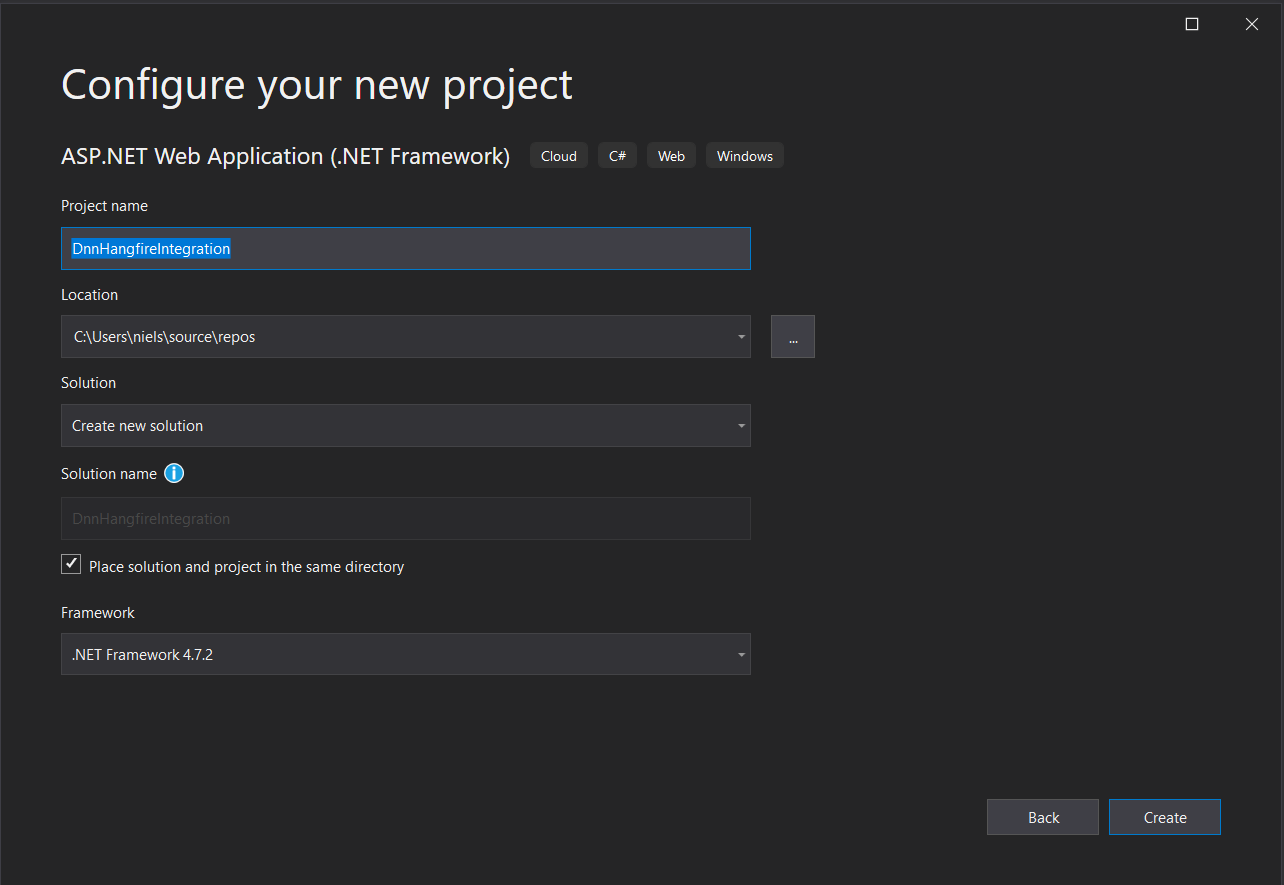
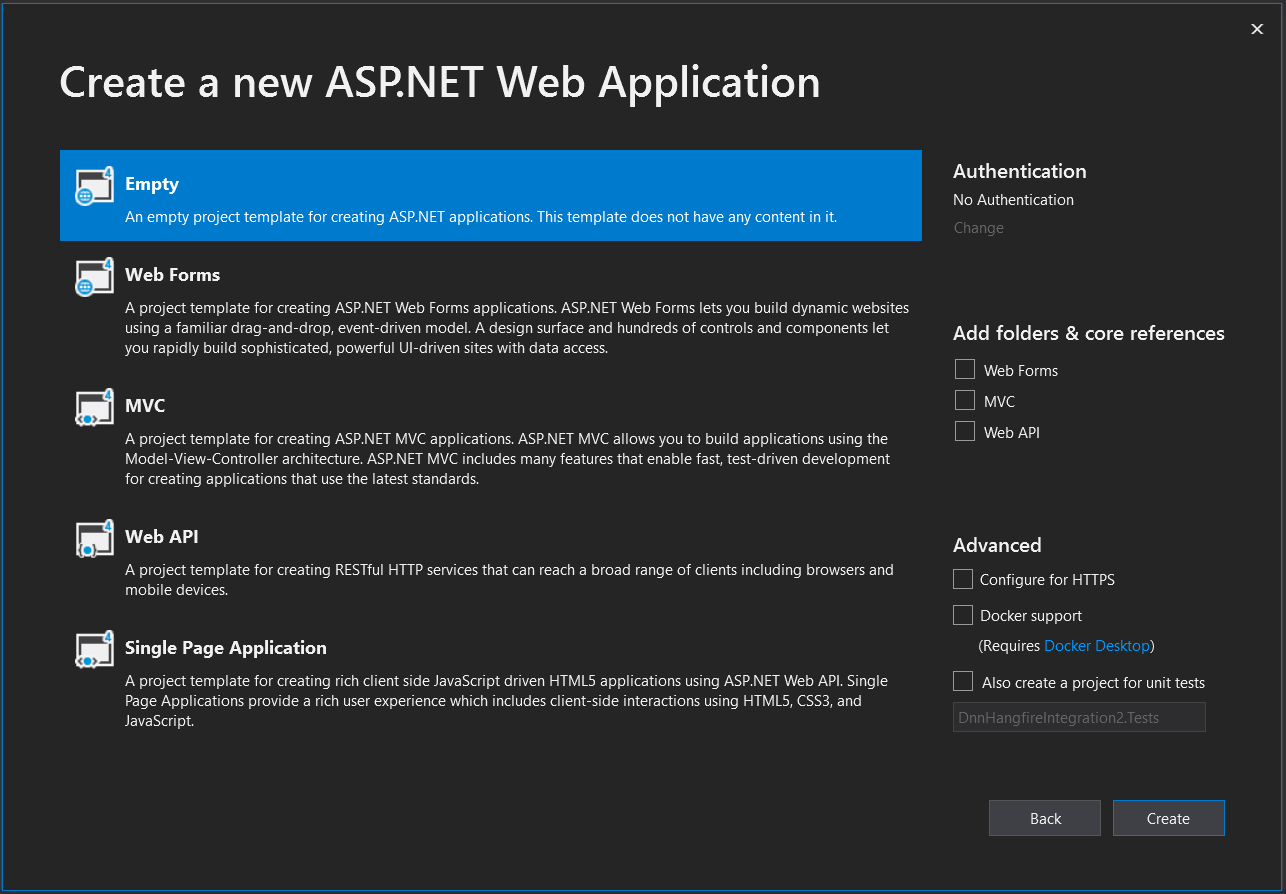
- Create an empty ASP.NET Framework project
- Install Hangfire NuGet packages
- Create a new SQL Database or reuse DNN's SQL Database
- Add ConnectionString for Hangfire
- Install OWIN to hook into the startup of the website
- Build and copy DLL's to DNN
The source code can be find on this GitHub Repository.
Integrate Hangfire into DNN #
Create a new ASP.NET Empty Project using Visual Studio:
Next, follow the Get Started with Hangfire for ASP.NET Applications steps on your new ASP.NET Empty Project.
Using the Package Manager Console inside of Visual Studio, run the following PowerShell commands:
Install-Package Hangfire.Core
Install-Package Hangfire.SqlServer
Install-Package Hangfire.AspNet
Optional: Create a new database which will be dedicated to Hangfire. Run this SQL script on your MSSQL Server:
CREATE DATABASE [HangfireTest]
GO
Add a ConnectionString to the DNN web.config that points to the new database.
(Don't update the web.config in the empty ASP.NET project)
If you created a new database, make sure the Windows user running the website has the db_owner role on the new database. Hangfire will automatically create new tables when run for the first time. After that you can tighten down the permissions.
<add name="HangfireConnection" connectionString="Data Source=.\SQLExpress;Database=HangfireTest;Integrated Security=True;" providerName="System.Data.SqlClient" />
Next, you need to configure Hangfire when the website starts up. Since it is hard to extend the Startup or Global.asax.cs file in DNN, you'll need to install and configure OWIN.
Install the following NuGet package using the Package Manager Console:
Install-Package Microsoft.Owin.Host.SystemWeb
Create an OWIN Startup class like this:
using Hangfire;
using Microsoft.Owin;
using Owin;

[assembly: OwinStartup(typeof(DnnHangfireIntegration.Startup))]

namespace DnnHangfireIntegration
{
    public class Startup
    {
        public void Configuration(IAppBuilder app)
        {
            GlobalConfiguration.Configuration.UseSqlServerStorage("HangfireConnection");
            app.UseHangfireServer();
            app.UseHangfireDashboard("/desktopmodules/hangfire");
        }
    }
}
Using the default path `/hangfire` will not work as DNN tries to resolve it to a page in the CMS. Using `/desktopmodules/hangfire` will prevent DNN from intercepting it.
For the Startup class to be invoked, you need to tell OWIN how to start your application through appsettings. Add the following appsetting to the web.config:
<add key="owin:AutomaticAppStartup" value="true"/>
The last step is to deploy the DLL's from our ASP.NET Project to the bin-folder of your DNN installation. Build your ASP.NET project and copy all DLL's from `/bin/debug` or `/bin/release` depending on which release configuration you chose. You need to copy at least these DLL's to the DNN bin folder:
- DnnHangfireIntegration.dll => This is your ASP.NET Project DLL
- Hangfire.AspNet.dll
- Hangfire.Core.dll
- Hangfire.SqlServer.dll
- Microsoft.Owin.dll
- Microsoft.Owin.Host.SystemWeb.dll
- Owin.dll
There are many other ways to deploy to DNN, but this walkthrough sticks to a simple copy/paste of DLL's due the lack of official guidance.
To verify Hangfire is working, browse to `/desktopmodules/hangfire`. Hangfire dashboard will only allow requests coming from localhost by default. If your DNN installation is hosted on a separate server, remote into the server and then verify access to the dashboard.
Limit Hangfire Dashboard to DNN SuperUsers #
It's likely you want to access the Hangfire Dashboard from a remote machine, but without leaving it exposed to the public. You can add modify authorization to the dashboard by passing in an implementation of `IDashboardAuthorizationFilter` as `DashboardOptions`.
Add the following class which implements IDashboardAuthorizationFilter:
using Hangfire.Dashboard;
using Microsoft.Owin;
using DotNetNuke.Entities.Users;

namespace DnnHangfireIntegration
{
    public class DnnAuthorizationFilter : IDashboardAuthorizationFilter
    {
        public bool Authorize(DashboardContext context)
        {
            var owinContext = new OwinContext(context.GetOwinEnvironment());
            if (!owinContext.Authentication.User.Identity.IsAuthenticated)
            {
                return false;
            }

            var userInfo = UserController.GetUserByName(owinContext.Authentication.User.Identity.Name);
            return userInfo.IsSuperUser;
        }
    }
}
Install the `DotNetNuke.Core` package to your project to be able to use DNN's `UserController` class.
Install-Package DotNetNuke.Core -Version 9.6.2
Now, update the Startup class so the new `DnnAuthorizationFilter` is passed in as part of the `DashboardOptions`:
using Hangfire;
using Hangfire.Dashboard;
using Microsoft.Owin;
using Owin;

[assembly: OwinStartup(typeof(DnnHangfireIntegration.Startup))]

namespace DnnHangfireIntegration
{
    public class Startup
    {
        public void Configuration(IAppBuilder app)
        {
            GlobalConfiguration.Configuration.UseSqlServerStorage("HangfireConnection");
            app.UseHangfireServer();
            app.UseHangfireDashboard("/desktopmodules/hangfire", new DashboardOptions
            {
                Authorization = new[] { new DnnAuthorizationFilter() }
            });
        }
    }
}
Build your project and copy the latest DLL of your project over to DNN's bin-folder. Now you need to login as a DNN SuperUser before accessing `/desktopmodules/hangfire`.
Now that Hangfire has been configured, you can start using Hangfire for CRON jobs and other background jobs.

