


How to run .NET Core Selenium UI tests on Azure DevOps Pipelines Windows/Ubuntu agents? 🚀

The previous blog post discussed how to create a cross-platform Selenium UI test project using .NET core. This post discusses how to take those UI tests and run them in Azure DevOps Pipelines on both Windows & Ubuntu agents. To follow along, fork this GitHub repository which contains the UI test project necessary to follow along in this post. The code has slightly been modified to take advantage of a .runsettings file.
In this post you'll learn:
- how to produce the UI test artifact in a Continuous Integration (CI) build
- how to run the UI test as part of a Continuous Delivery (CD) pipeline using the UI test artifact
But before getting your hands dirty, let's talk about the two different ways of using Azure Pipelines.
Classic Azure Pipelines vs. YAML Azure Pipelines #
Before YAML pipelines was introduced, you had to use the user interface to assemble both build pipelines and release pipelines. These pipelines are stored using JSON behind the scenes which you can export and import. This is now referred to as "Classic" Azure Pipelines.
Both Classic and YAML have their advantages and disadvantages.
Classic:
- more accessible to newcomers
- you can quickly iterate
- versioning happens behind the scene
- no need to commit/push to source control
- no need to learn a new configuration language
- more mature/feature rich
YAML:
- stores yaml-file as part of your source control
- open-source projects can share their build/release process using the yaml-file
- using "Unified pipelines" you can describe the build and release process in a single yaml-file
- Visual interface for YAML builds bring the user friendly UI from classic and combines it with YAML.
Releases UI doesn't have good YAML support yet.
Classic is the most feature rich with YAML slowly catching up. Before considering YAML it is important to evaluate whether all required features are supported by YAML pipelines. This post will guide you through creating a YAML build pipeline, but will use Classic for release pipelines because the YAML support for releases isn't strong at this moment.
Luckily some of the missing functionality is on the roadmap for YAML pipelines as you can read at the MS Dev Blog "Azure DevOps Roadmap update for 2019 Q3".
With that out of the way, it's time to build your build pipeline.
Create a Continuous Integration pipeline for a .NET Core Selenium test project #
When using YAML pipelines, Azure DevOps will read your YAML configuration file and execute the steps as prescribed. To set this up, you'll first need to create the yaml file, and then tell Azure DevOps where to find it inside your repository.
In the root of your solution, add the following 'azure-pipelines.yml' file.
# any commit to the master branch will trigger the CI build
trigger:
- master

# use a Windows agent with VS to build the .NET Core MSTest project
# you can replace this with Ubuntu too without changing the tasks
pool:
  name: Hosted Windows 2019 with VS2019

steps:
# install the required .NET Core SDK version
# only necessary if the agent doesn't already have the required SDK
- task: DotNetCoreInstaller@0
  displayName: 'Use .NET Core sdk 2.2.301'
  inputs:
    version: 2.2.301

# restore Nuget packages/dependencies
- task: DotNetCoreCLI@2
  displayName: Restore
  inputs:
    command: restore
    projects: '**/Demo.SeleniumTests.csproj'

# publish the UI test project to the SeleliumTest subfolder in the Artifact Staging Directory
# optionally, you can add more steps to publish your own website alongside your SeleniumTests in another task
- task: DotNetCoreCLI@2
  displayName: Publish
  inputs:
    command: publish
    publishWebProjects: false
    projects: '**/Demo.SeleniumTests.csproj'
    arguments: '--configuration Release -o $(build.artifactstagingdirectory)/SeleniumTests'
    zipAfterPublish: false
    modifyOutputPath: false

# publish all artifacts in the Artifact Stagign Directory
# this will place the UI Test artifacts in Azure DevOps for future use in the deployment pipeline
- task: PublishBuildArtifacts@1
  displayName: 'Publish Artifact'
  inputs:
    PathtoPublish: '$(build.artifactstagingdirectory)'
  condition: succeededOrFailed()
Refer to the comments which explain the different parts of the yaml file. In summary, when you push a commit to the master branch Azure DevOps will:
- install the .NET Core SDK
- restore the NuGet packages for the MS Test project
- publish the MS Test project
- publish the dotnet publish results back to Azure DevOps as an artifact
To use Ubuntu, swap "Hosted Windows 2019 with VS2019" with "Hosted Ubuntu 1604".
All the steps in the yaml-file should work on both Windows and Ubuntu. Possibly MacOS too but I didn't verify this.
Important note: You can use the DLL's produced on one platform and run them on a different platform. For example, when using a linux distro to build the MS Test project, you can execute the DLL's on Windows, MacOS, and any supported Linux distro.
Now that you have added the 'azure-pipelines.yml' file to your GIT repository, navigate to the Azure DevOps Build section in your DevOps project.
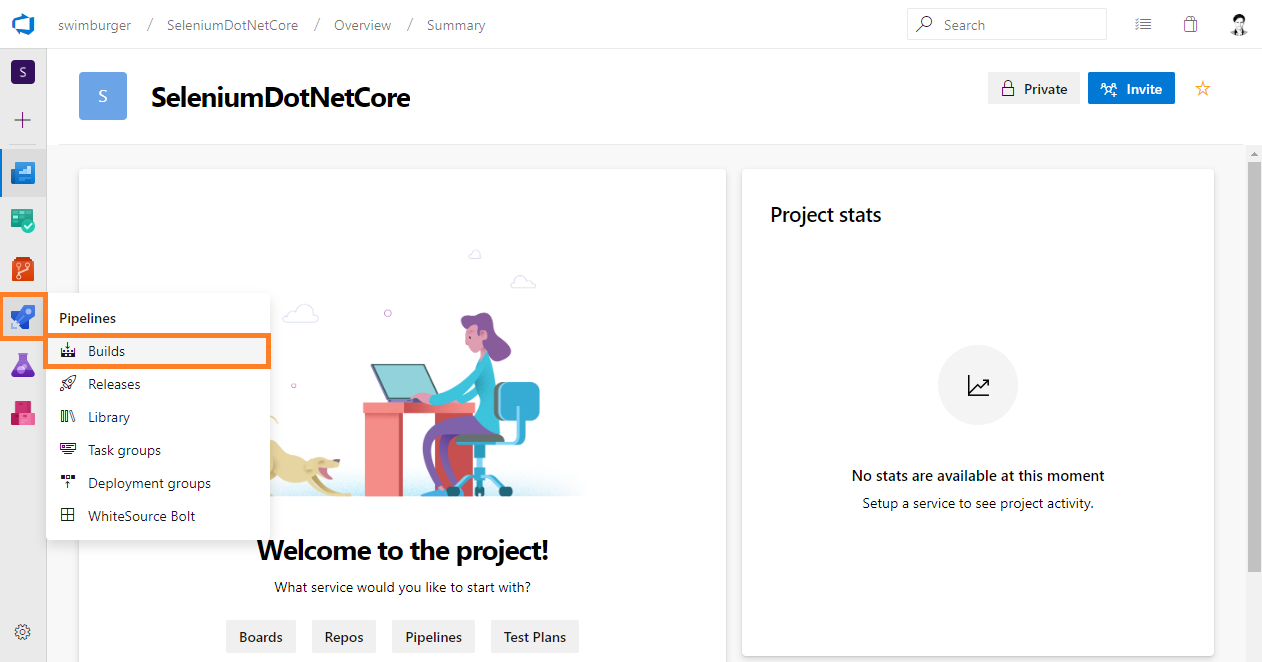
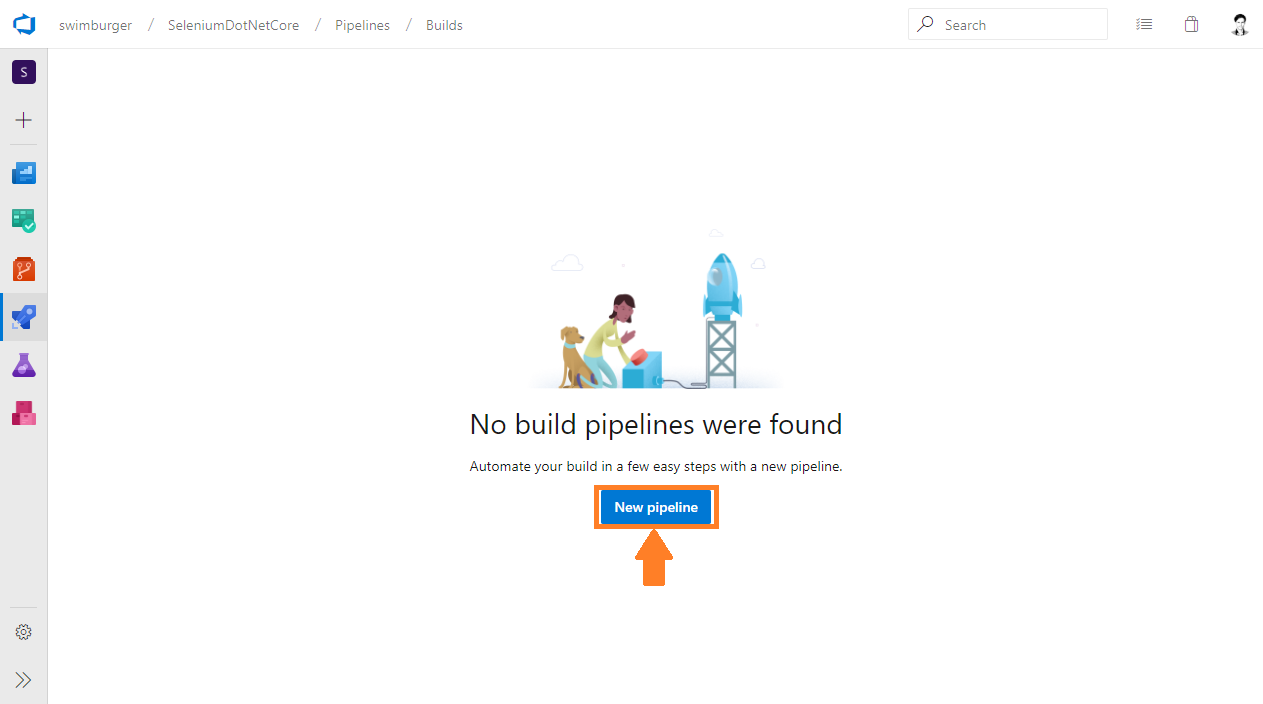
Click the "New pipeline" button.
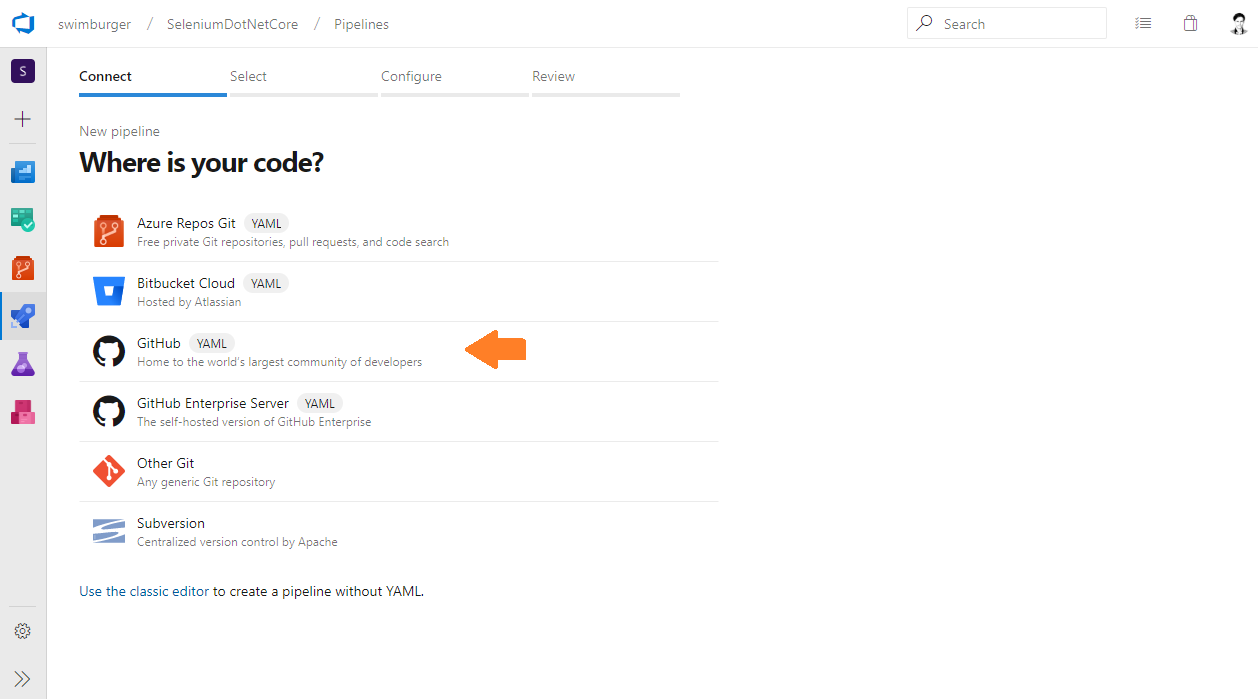
GitHub will be used in this walkthrough, but select wherever you store your source control repository in this step.
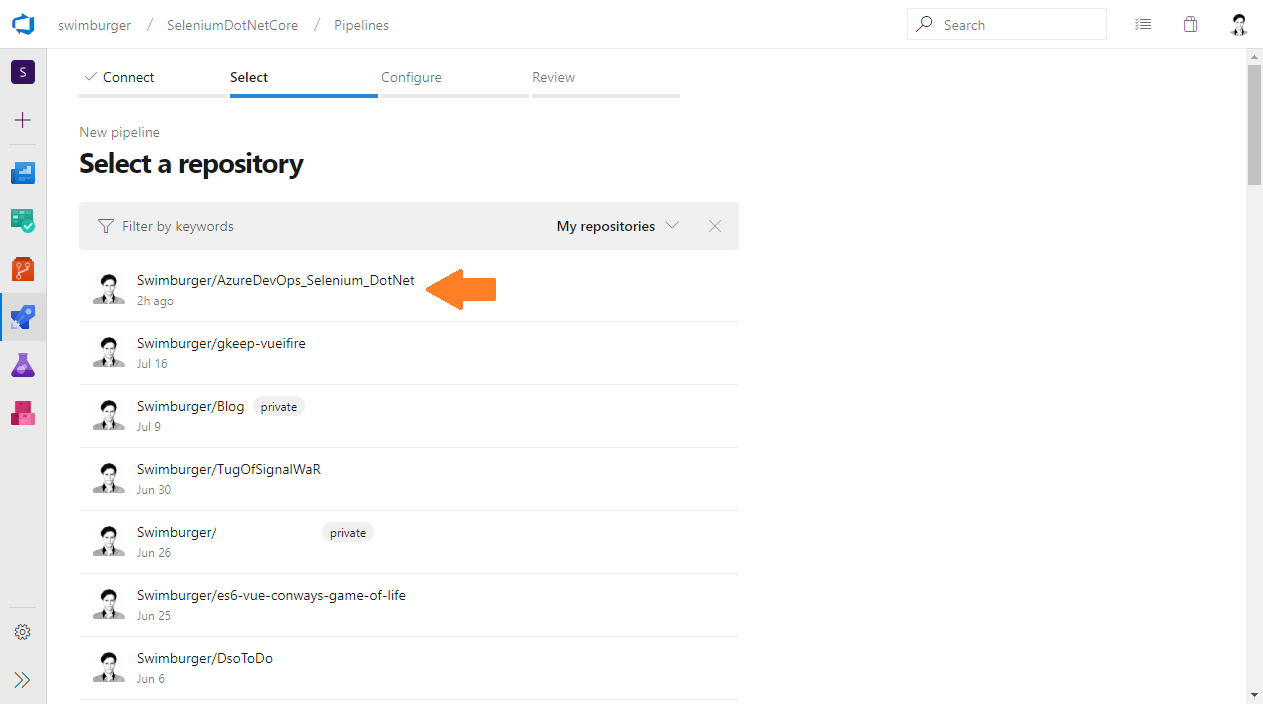
Select your desired repository from the list.
You already have an 'azure-pipelines.yml' file, therefor Azure DevOps will use that as the "Configure" step and skip to the "Review" step.
If you don't have the yaml file, Azure DevOps will offer you some starter templates and automatically commit the new yaml-file into your GIT repo.
Click "Run" to finish creating the build pipeline.

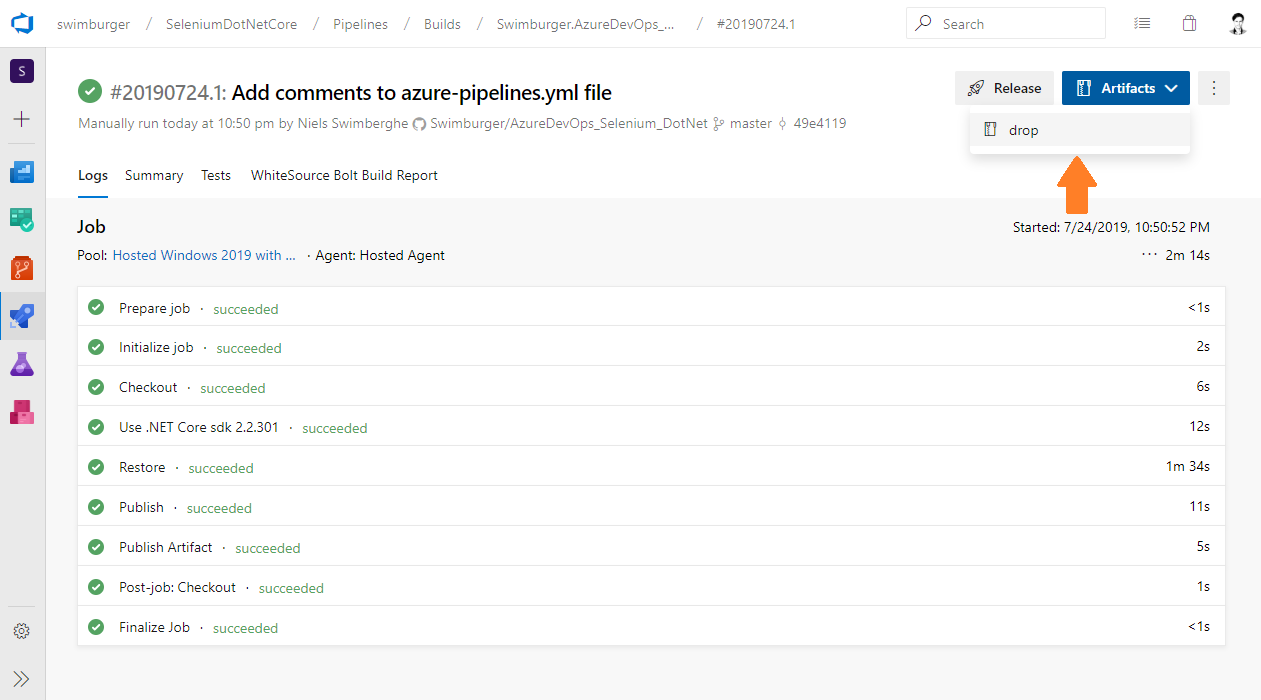
After creating the build pipeline, the pipeline will run for the first time and hopefully succeed. 🤞
If successful, the "Artifacts" button will appear. Click the "Artifacts" button, followed by the "drop" button.
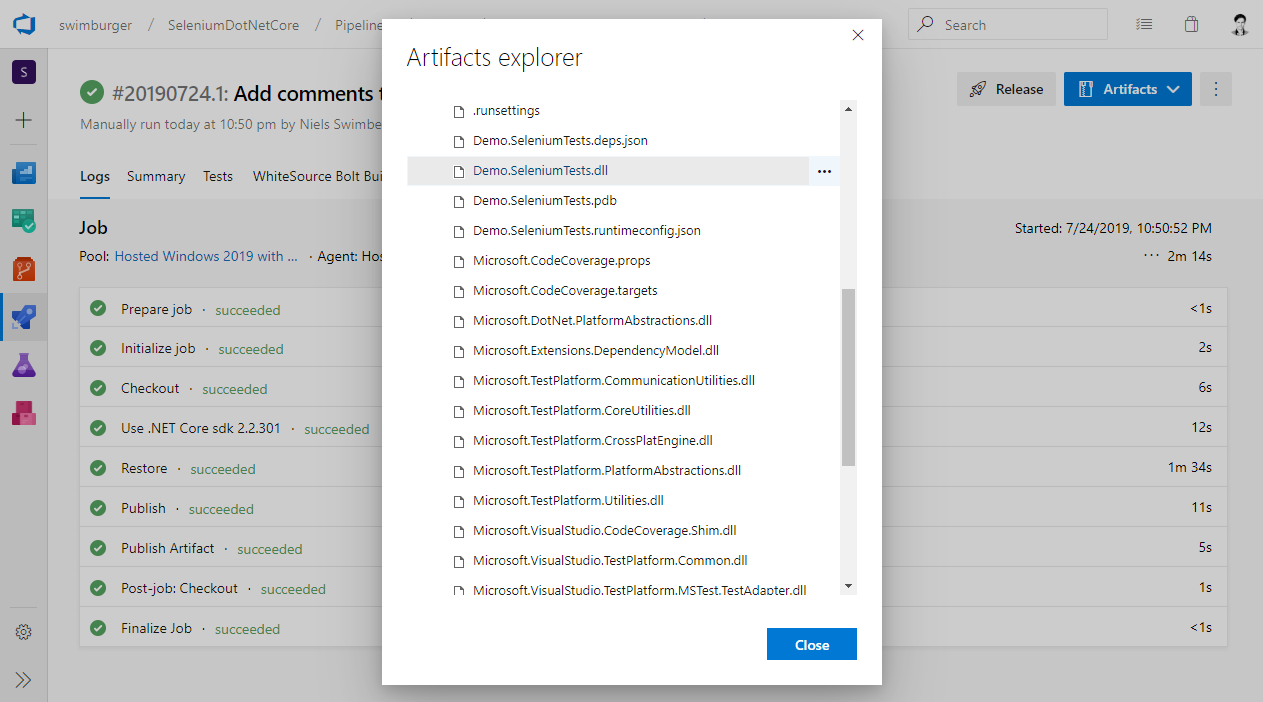
In the Artifact modal, you can explore and download the published build artifacts:
Now that you have a build artifact, you can move on to creating a Continuous Delivery pipeline which will grab the artifact.
Create a Continuous Delivery pipeline for a .NET Core Selenium test project #
Thus far you've only used YAML pipelines, but the YAML support for Release pipelines isn't as strong. Therefore the guide below will now use the Classic pipelines to create the Release pipeline.
Create release pipeline #

Navigate to the Releases tab and click the "New pipeline" button.
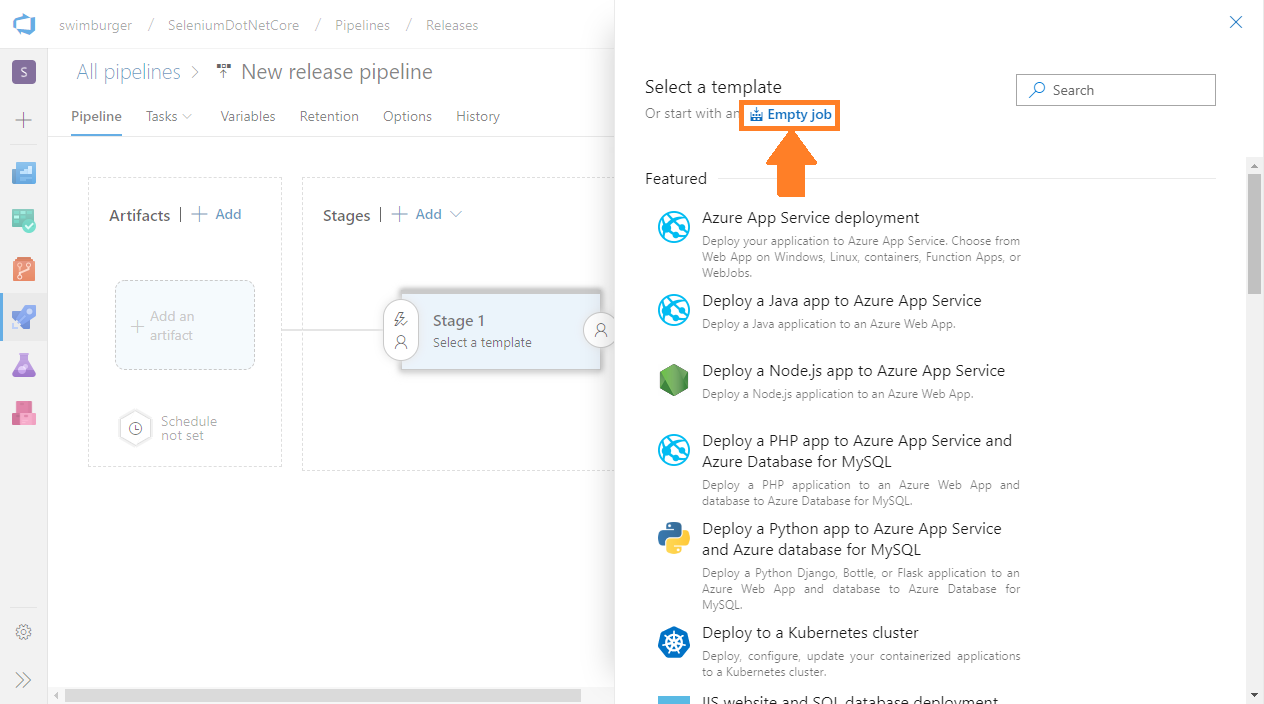
The new release pipeline will prompt you to select a starter template. These templates are great to get started quickly.
Alternatively, you can start using an "Empty job" to start from scratch. Click the "Empty job" link.
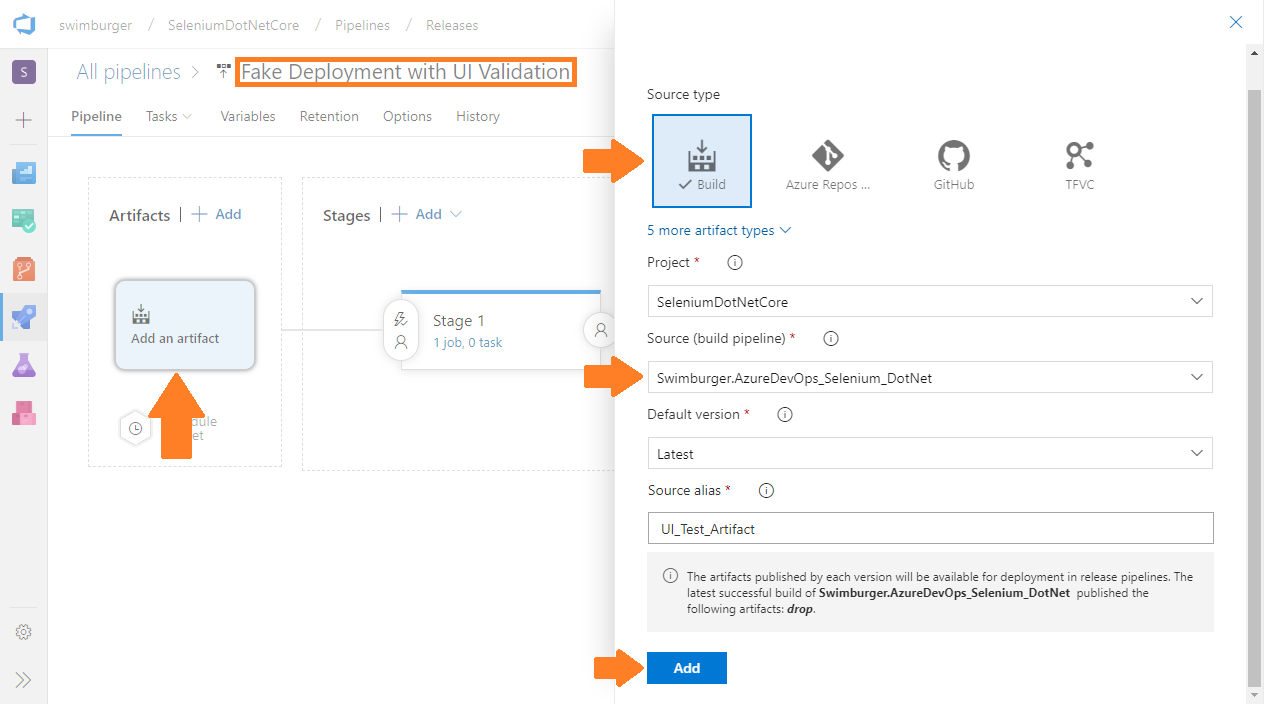
Rename the pipeline to "Fake Deployment with UI Validation".
Click on the "Add an artifact" area and match the configuration shown on the screenshot above.
Here's an overview of what these fields mean:
- Source type: This will let you pick the source type to use when fetching an artifact.
- Project: This is the project where you added your CI build.
- Source: This drop down will list out all the possible CI build pipelines.
Select the CI build pipeline which produces the UI Test project artifact. - Default version: Specify how the artifact version should be determined.
- Source alias: Rename this to UI_Test_Artifact. You can use this Alias to refer to the artifact in the pipeline.
Once the configuration matches, click the "Add" button.
Create QA Dummy Deploy stage #

Click the "1 job, 0 task" link in the "Stage 1" stage to start configuring the jobs/tasks within the stage.

Rename the "Stage name" to "QA Dummy Deploy". This stage will not actually deploy anything, but let's pretend it does.
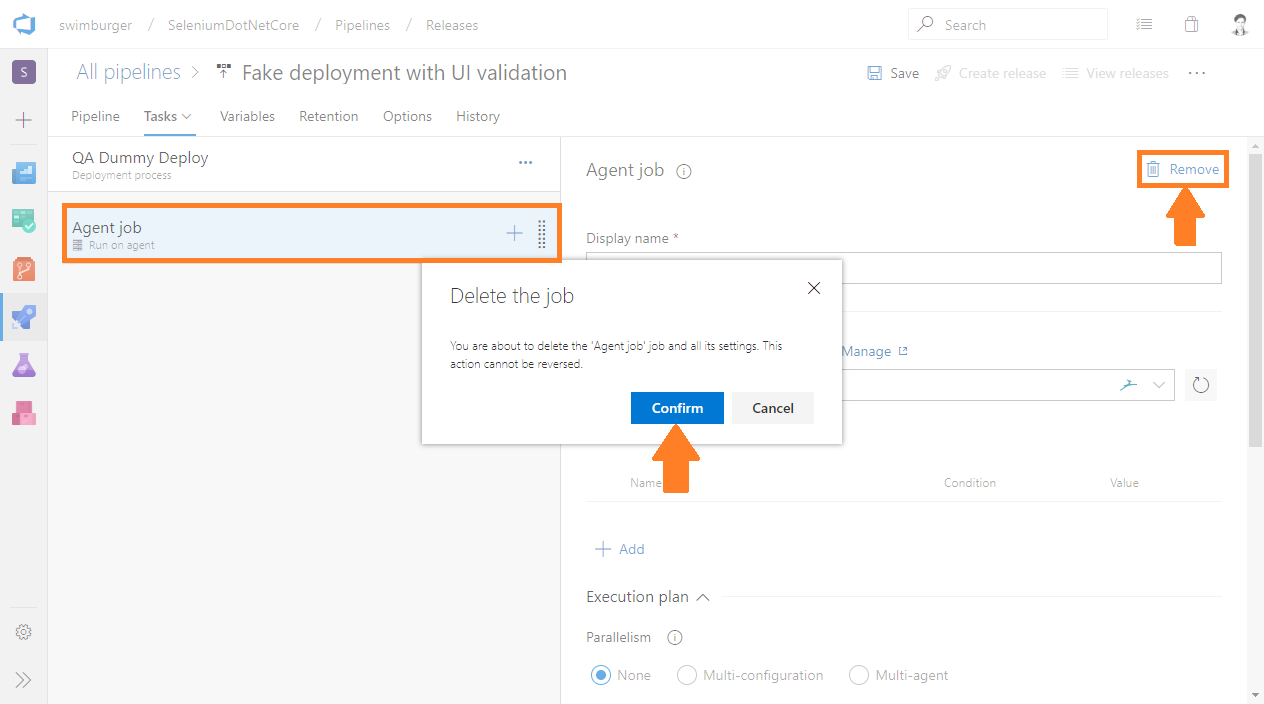
Select the "Agent job" and click the "Remove" link.

There are 3 types of jobs you can add to stages:
- Agent job: jobs that run on an agent
- Deployment group job: jobs that run on multiple VM's joined to the deployment group
- Agentless job: jobs that don't require an agent to run
Since this is a dummy deploy stage, add an empty agentless job. This will be the fastest when run.
Click the three dots on the "QA Dummy Deploy" and click on "Add an agentless job" in the context menu.

Rename the new job to "QA Dummy Deploy" as well.
Create UI Test on Windows stage #

Navigate back to the "Pipeline" view by clicking on the "Pipeline" tab.
Click the "Add" button underneath the "QA Dummy Deploy" stage. This will add a new stage which will run after the "QA Dummy Deploy" stage.

Rename the stage name to "Verify QA using Windows Agent" and click on the "1 job, 0 task" to navigate to the Tasks view of the stage.
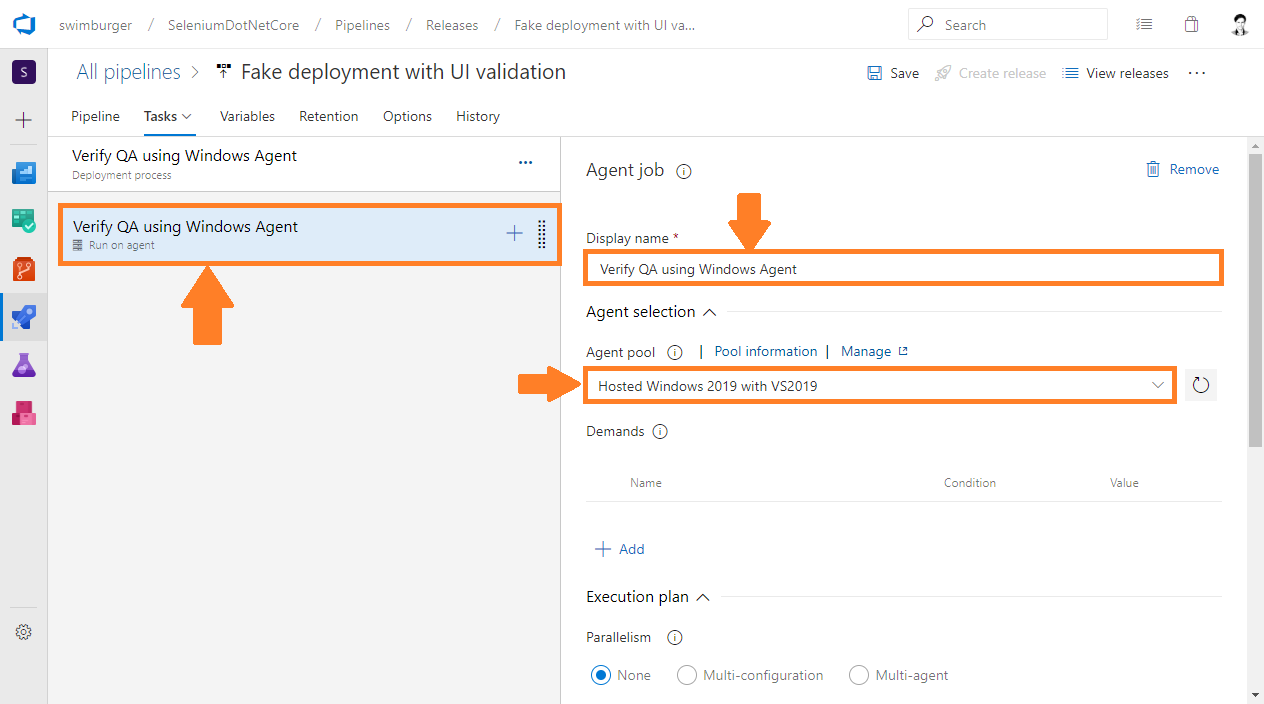
Rename the existing job to "Verify QA using Windows Agent" as well.
Change the "Agent pool" drop down to use "Hosted Windows 2019 with VS2019".
Agent pools determine what agent the tasks will be run on. Out of the box, Azure DevOps services will give you multiple pre-configured agent pools.
You can add your own agent pools by configuring your machines as an Azure DevOps agent.

Click the "+" icon on the "Verify QA using Windows Agent" job.
Search for "PowerShell" and add the PowerShell task by clicking the "Add" button on the "PowerShell" task.
This PowerShell task will download the ChromeDriver from Google and place them alongside the UI Test DLL's.

Configure the PowerShell task to match with the screenshot above:
- Display name: "Download ChromeDriver 75"
- Type: Check the "Inline" radio button.
You can run PowerShell by using a "File Path" referencing the PowerShell script file, or use the "Inline" option to simply copy the PowerShell into the inline "Script" field. - Script: This is the PowerShell code that will be executed by the agent.
The code will download the ChromeDriver and place it alongside the UI Test DLL's.
Copy the code from below:
Invoke-WebRequest -Uri "https://chromedriver.storage.googleapis.com/75.0.3770.90/chromedriver_win32.zip" -OutFile $(System.DefaultWorkingDirectory)/chromedriver_win32.zip;

Expand-Archive $(System.DefaultWorkingDirectory)/chromedriver_win32.zip -DestinationPath $(System.DefaultWorkingDirectory)/chromedriver_win32;

Copy-Item "$(System.DefaultWorkingDirectory)/chromedriver_win32/chromedriver.exe" -Destination "$(System.DefaultWorkingDirectory)/UI_Test_Artifact/drop/SeleniumTests/"

When you want to run the UI test project from source code, you can use the 'dotnet test' command which will look for your *.csproj file. In your case, you only have the DLL-files and the 'dotnet test' command will not work.
For this use-case you have to use the 'dotnet vstest' command. The syntax is slightly different but essentially works the same as the test command. To run the UI test, you'll need to run the 'dotnet vstest' with some extra parameters to generate the test results.
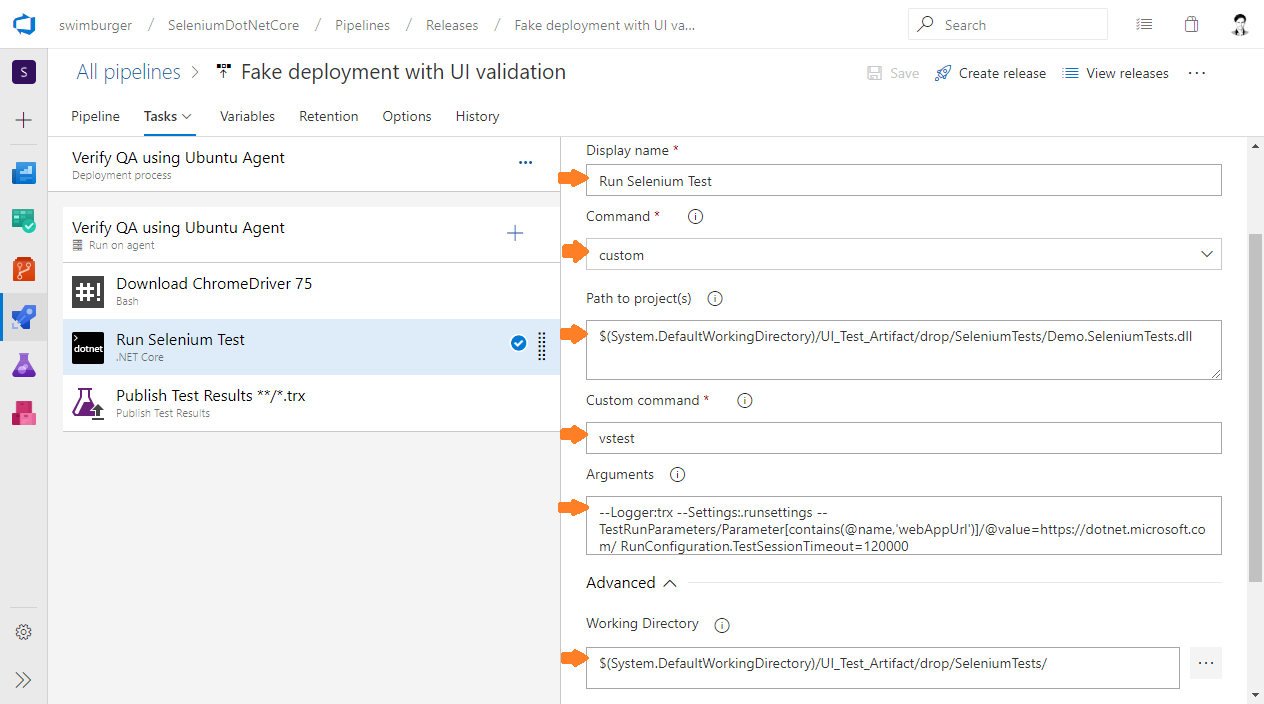
Add another task by clicking on the "+" icon. Search for the ".NET Core" task and click the "Add" button.
Configure the .NET Core task to match with the above screenshot:
- Display name: Run Selenium Test
- Command: custom
- Path to project: $(System.DefaultWorkingDirectory)\UI_Test_Artifact\drop\SeleniumTests\Demo.SeleniumTests.dll
- Custom command: vstest
- Arguments: --Logger:trx --Settings:.runsettings -- TestRunParameters/Parameter[contains(@name,'webAppUrl')]/@value=https://dotnet.microsoft.com/ RunConfiguration.TestSessionTimeout=120000
- Working Directory: $(System.DefaultWorkingDirectory)\UI_Test_Artifact\drop\SeleniumTests
The Arguments will be passed to the 'dotnet vstest' command. Here's what the arguments do:
- Logger: specify what format to log the test execution results. trx is the Visual Studio Test Results File format.
Using this argument a 'TestResults' folder will be created and a trx-file will be created inside the folder. - Settings: using this argument you can specify a .runsettings file. You can find the .runsettings file in the GitHub repository for this guide.
- -- : everything after '--' are extra arguments to override the settings inside of the .runsettings file.
This allows you to easily change the webAppUrl for each stage (DEV/QA/STAGING/PROD/etc).
The 'RunConfiguration.TestSessionTimeout' will specify the timeout for individual tests to 2 minutes (120 seconds).

The last step is to publish the results of the test that are stored in the trx-file.
Add another task and this time look for "Publish Test Results".
Configure the task to match the screenshot above:
- Display name: Publish Test Results **\*.trx
- Test result format: VSTest
- Test results files: **\*.trx
- Search folder: $(System.DefaultWorkingDirectory)\UI_Test_Artifact\drop\SeleniumTests\TestResults
When configuring the task as above, the task expect VSTest format result files and will search for trx-files using the **\*.trx Regex pattern inside the TestResults folder.
Any subfolders of TestResults will also be scanned using the **\*.trx pattern. The result files will be used to populate the Tests results interface in Azure DevOps.
Now you have a working UI Test stage. You can try this by creating a new release. 🎊
Create UI Test on Ubuntu stage #
To run the UI Test on Ubuntu instead of Windows, you can run the same tasks on Ubuntu with slight platform variations.

Click on the "Add" button underneath the "QA Dummy Deploy" stage.
This will create another stage that will run after the "QA Dummy Deploy" but in parallel to the Windows stage.
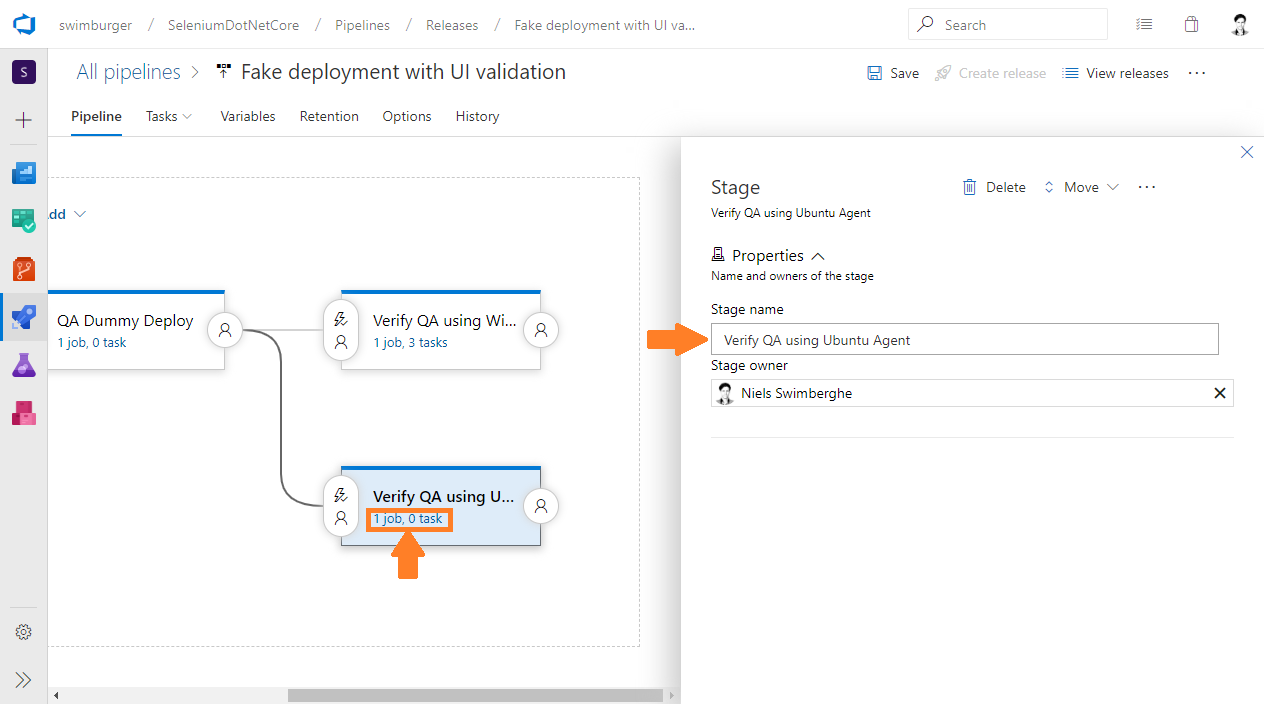
Rename the new stage to "Verify QA using Ubuntu Agent" and click on the "1 job, 0 task".

Rename the default job to "Verify QA using Ubuntu Agent" and select the "Hosted Ubuntu 1604" agent pool

Add a "Bash" task and configure the task to match with the screenshot above:
- Display name: Download ChromeDriver 75
- Type: Inline
- Script: Copy the script from below.
- Working Directory: $(System.DefaultWorkingDirectory)/UI_Test_Artifact/drop/SeleniumTests
Download ChromeDriver 75 bash script:
wget https://chromedriver.storage.googleapis.com/75.0.3770.140/chromedriver_linux64.zip
unzip chromedriver_linux64.zip
chmod +x chromedriver
The logic for the bash script is the same as the PowerShell script, except on Linux you need to change the permissions of the chromedriver before it can be used.
Alternatively, you can also use PowerShell on Ubuntu! NANI?!😲
The Ubuntu agent has PowerShell Core pre-installed. PowerShell Core is the cross-platform version of PowerShell based on .NET Core.
If PowerShell is your jam, here's the script for that:
Invoke-WebRequest -Uri "https://chromedriver.storage.googleapis.com/75.0.3770.140/chromedriver_linux64.zip" -OutFile $(System.DefaultWorkingDirectory)/chromedriver_linux64.zip;

Expand-Archive $(System.DefaultWorkingDirectory)/chromedriver_linux64.zip -DestinationPath $(System.DefaultWorkingDirectory)/chromedriver_linux64;

Copy-Item "$(System.DefaultWorkingDirectory)/chromedriver_linux64/chromedriver" -Destination "$(System.DefaultWorkingDirectory)/UI_Test_Artifact/drop/SeleniumTests/"

chmod +x $(System.DefaultWorkingDirectory)/UI_Test_Artifact/drop/SeleniumTests/chromedriver
You may notice that the PowerShell script is pretty much the same as the script for Windows, very cool!
Add a new ".NET Core" task to the job and match the configuration with the screenshot above:
- Display name: Run Selenium Test
- Command: custom
- Path to project(s): $(System.DefaultWorkingDirectory)/UI_Test_Artifact/drop/SeleniumTests/Demo.SeleniumTests.dll
- Custom command: vstest
- Arguments: --Logger:trx --Settings:.runsettings -- TestRunParameters/Parameter[contains(@name,'webAppUrl')]/@value=https://dotnet.microsoft.com/ RunConfiguration.TestSessionTimeout=120000
- Working Directory: $(System.DefaultWorkingDirectory)/UI_Test_Artifact/drop/SeleniumTests/
This configuration is exactly the same as for the Windows stage. For more information refer back to the Windows stage.

Add a "Publish Test results" and match the configuration with the screenshot above:
- Display name: Publish Test Results **/*.trx
- Test result format: VSTest
- Test results files: **/*.trx
- Search folder: $(System.DefaultWorkingDirectory)/UI_Test_Artifact/drop/SeleniumTests/TestResults
This configuration is exactly the same as for the Windows stage. For more information refer back to the Windows stage.
Test the release pipeline #
Now that the release pipeline has been created, you can test it out by creating a release.
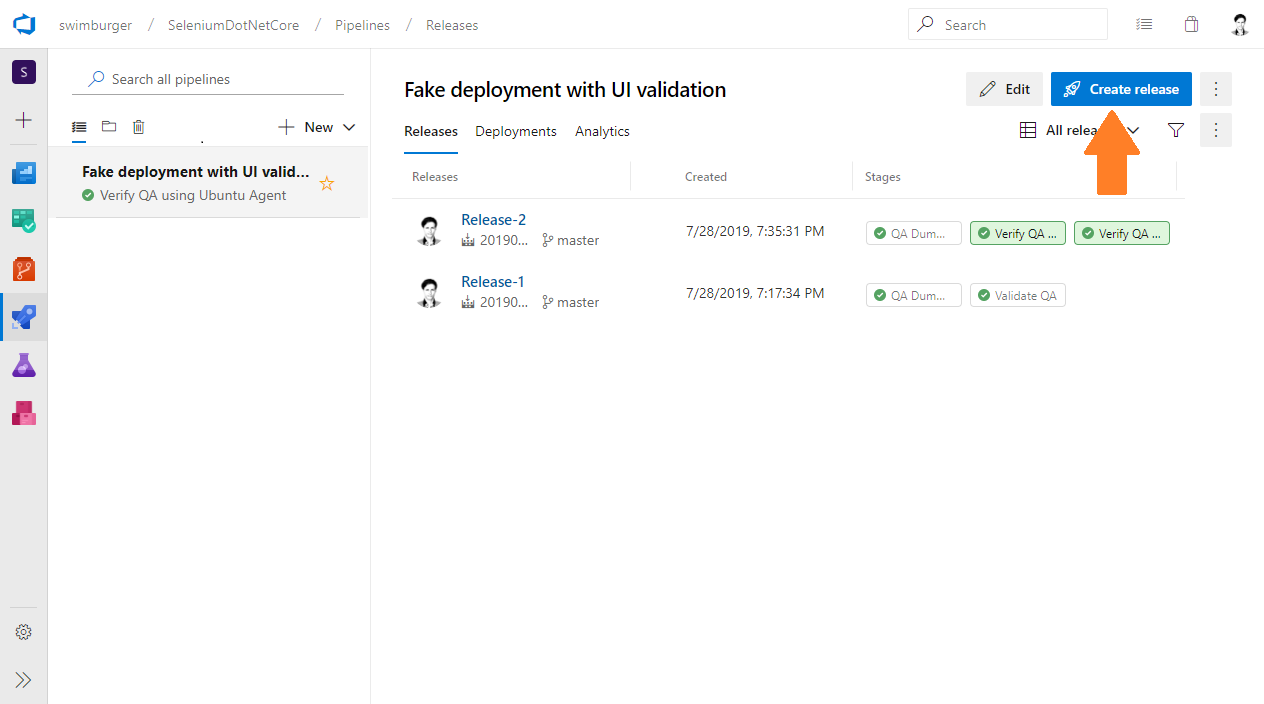
Navigate back to the releases overview screen and click the "Create release" button.
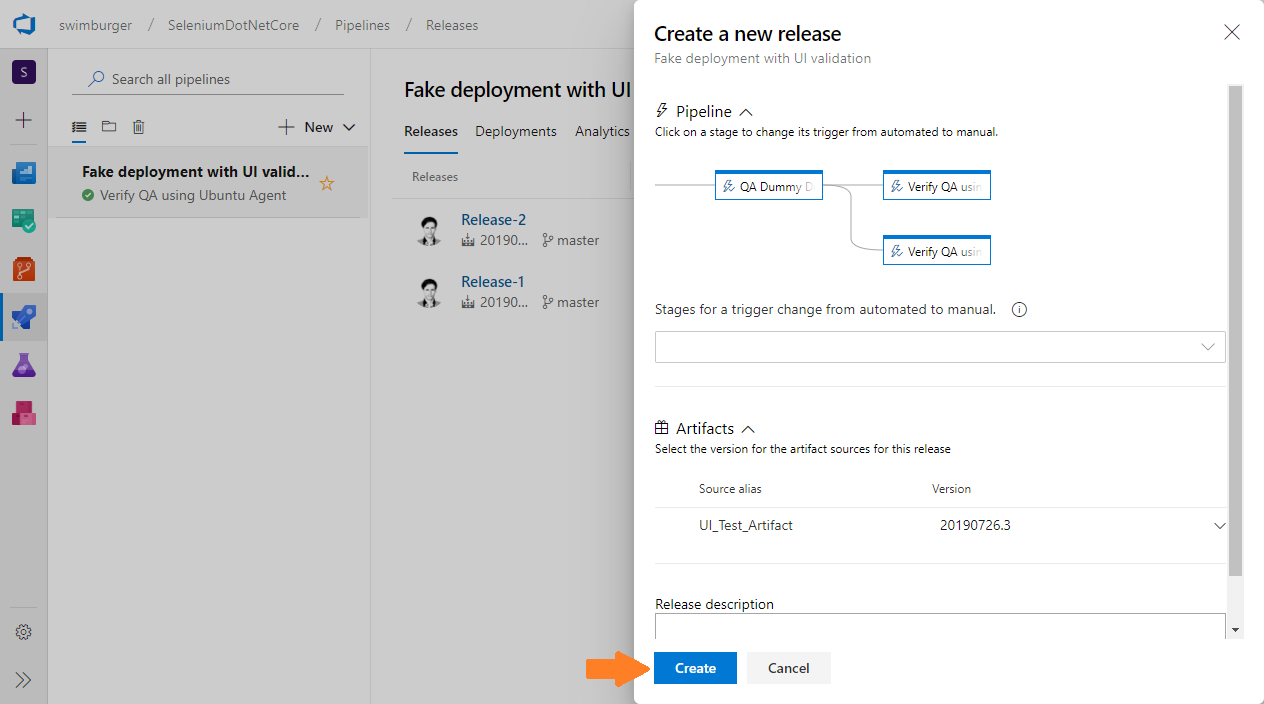
After the "Create a new release" details screen pops up, click the "Create" button.
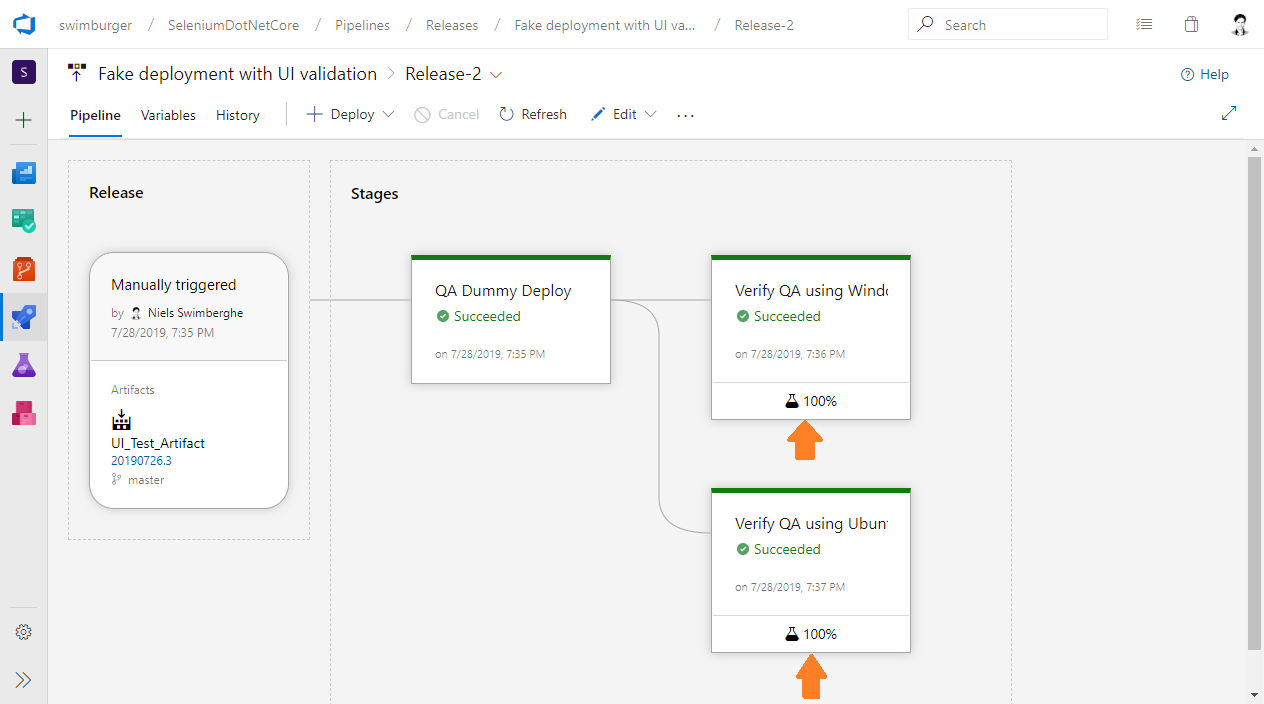
While the release is running, you can inspect the progress and see the changes in real time.
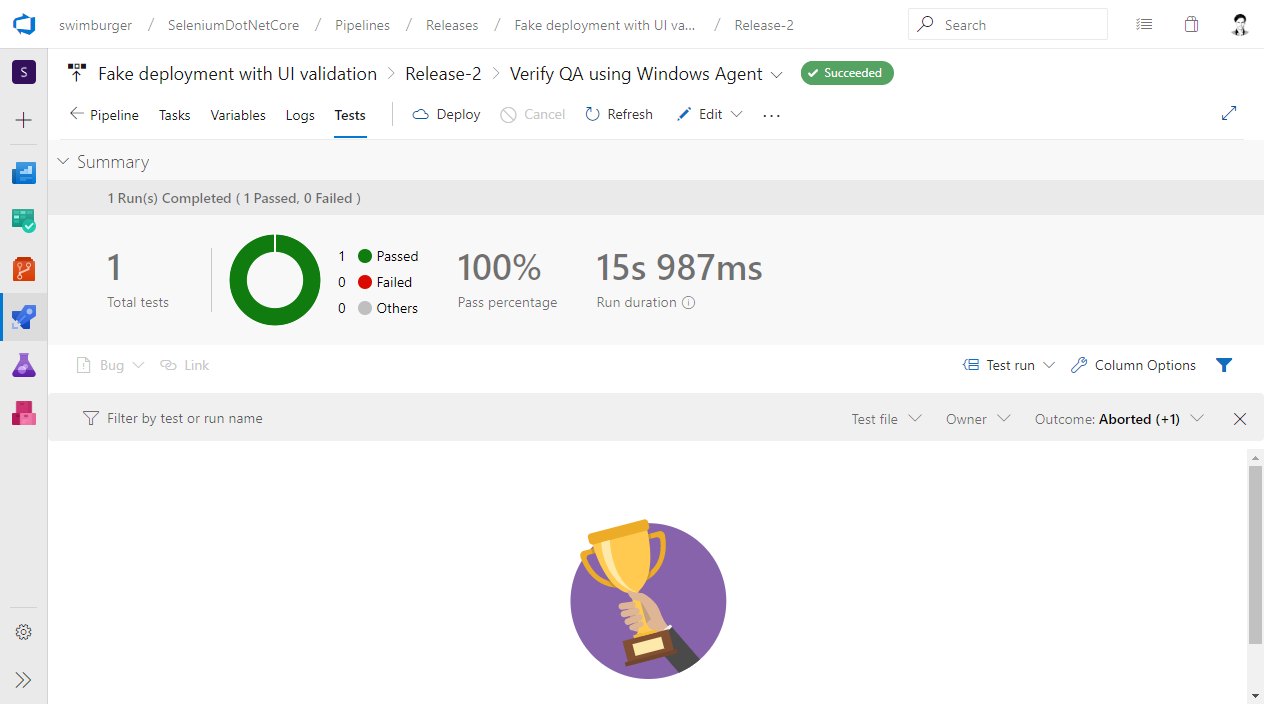
When clicking inspect a specific stage you can find more details including the test results.
Summary #
In this guide you learned how to
- create a continuous integration pipeline using YAML Azure DevOps Pipelines
- use the dotnet CLI to
- build
- test using source code (dotnet test)
- test using published DLL's (dotnet vstest)
- create a continuous deployment pipeline using Classic Azure DevOps Pipelines
- run .NET UI tests on Windows & Ubuntu
You can expand this example to deploy to production if all UI tests succeed and then verify production with the same UI test logic. Usually automated UI tests aren't sufficient, so it's a good idea to add a pre-deployment approval gate. The approval gate can be approved by a QA engineer after doing additional exploratory testing.
Enjoy automating! 😎

