


Hidden Gem: Take screenshots using built-in commands in Chrome/Edge

Chromium browsers such as Chrome and Edge have many lesser known features. One of those features is the ability to take screenshots of your current tab content.
There are 4 different screenshot commands:
- Capture area screenshot: Left-click drag over the area you want to screenshot
- Capture full size screenshot: Take a screenshot of the entire page, including off-screen scrollabe content
- Capture node screenshot: Take a screenshot of the selected HtmlNode
- Capture screenshot: Take a screenshot of the viewport (content that's visible)
These commands are even more powerful when you combine them with the device toolbar which let's you emulate different devices and resolutions.
If you prefer video content, you can learn how to take screenshots using Chromium in this YouTube video:
Capture area screenshot #
The 'Capture area screenshot' will allow you to draw a square on your web page which will then be exported as a PNG-file. This is basically a lite-version of the 'Snipping tool' or 'Snip & Sketch' application.
This is how to use 'Capture area screenshot':
- Open DevTools by pressing F12, ctrl+shift+i, or by opening the menu > More Tools > Developer tools.
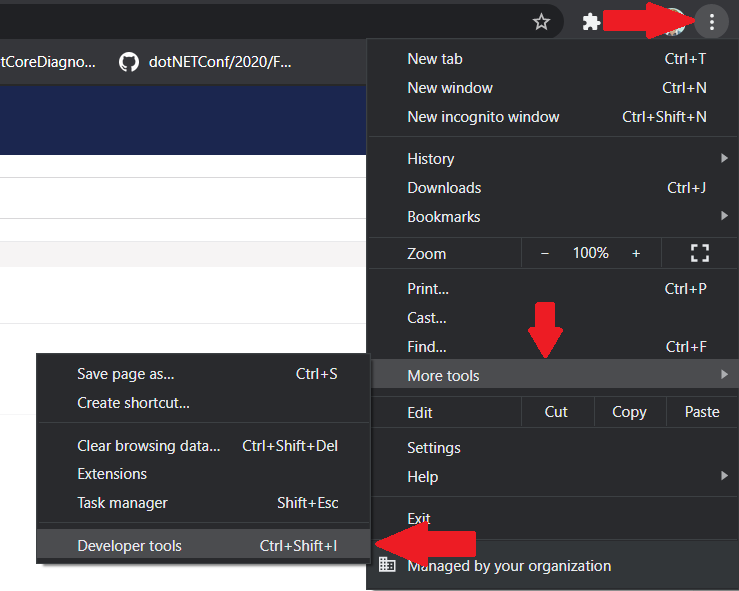
- Next, open the 'Run command' window by pressing ctrl+shift+p or by opening the menu inside of the DevTools window, click 'Run command'.

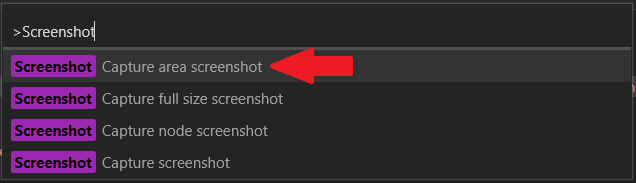
- Type 'Screenshot' and select 'Capture area screenshot'.
- Focus back onto the web page and draw a rectangle by left-clicking and dragging the mouse.

- Now the browser will automatically save the screenshot to disk or prompt you for a location to store it.
Capture full size screenshot #
The 'Capture full size screenshot' will take a screenshot of the entire webpage for you, including the content that's off-screen which you would normally have to scroll for. This is by far the most useful screenshot command as it is really hard to do manually.
This is how to use 'Capture full size screenshot':
- Open DevTools by pressing F12, ctrl+shift+i, or by opening the menu > More Tools > Developer tools.
- Next, open the 'Run command' window by pressing ctrl+shift+p or by opening the menu inside of the DevTools window, click 'Run command'.
- Type 'Screenshot' and select 'Capture full size screenshot'.

- Now the browser will automatically save the screenshot to disk or prompt you for a location to store it.
Capture node screenshot #
The 'Capture node screenshot' will take a screenshot of the HTML Node you focused on in the DevTools.
This is how to use 'Capture node screenshot':
Chrome/Edge version 86 introduced an easier way to capture node screenshots:
- Open DevTools by pressing F12, ctrl+shift+i, or by opening the menu > More Tools > Developer tools.
- Next, select the HTML node you want to take a screenshot of in the 'Elements' tab.
- Right-click the node and click "Capture node screenshot" in the context menu.

- Now the browser will automatically save the screenshot to disk or prompt you for a location to store it.
This is the alternative way to capture node screenshot which is available pre-86 Chrome/Edge:
- Open DevTools by pressing F12, ctrl+shift+i, or by opening the menu > More Tools > Developer tools.
- Next, select the HTML you want to take a screenshot of in the 'Elements' tab.
If you skip this step, nothing will happen when running the screenshot command and no warning will be shown.
- Open the 'Run command' window by pressing ctrl+shift+p or by opening the menu inside of the DevTools window, click 'Run command'.
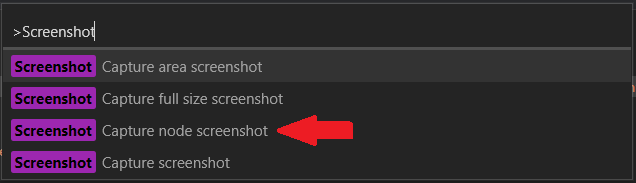
- Type 'Screenshot' and select 'Capture node screenshot'.
- Now the browser will automatically save the screenshot to disk or prompt you for a location to store it.
Capture screenshot #
The 'Capture screenshot' will take a screenshot of the viewport. With other words, everything of the website that is visible inside the browser.
This is how to use 'Capture screenshot':
- Open DevTools by pressing F12, ctrl+shift+i, or by opening the menu > More Tools > Developer tools.
- Open the 'Run command' window by pressing ctrl+shift+p or by opening the menu inside of the DevTools window, click 'Run command'.
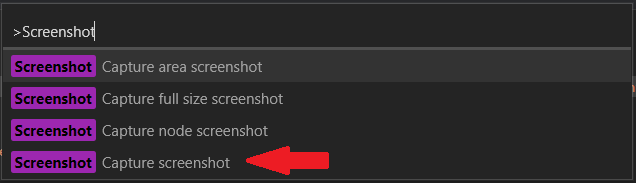
- Type 'Screenshot' and select 'Capture screenshot'.
- Now the browser will automatically save the screenshot to disk or prompt you for a location to store it.
Taking screenshots while emulating devices #
Chromium browsers also have powerful tools to simulate other devices such as mobiles phones, tablets, and computers with different resolutions. Combining this with the screenshot commands allows you to quickly take screenshots of what it would look like on a particular device.
Even if your own machine's resolution is lower than the simulated device, the screenshots will be in the resolution of the simulated device. This basically means you can take screenshots in higher resolution than your own screen!
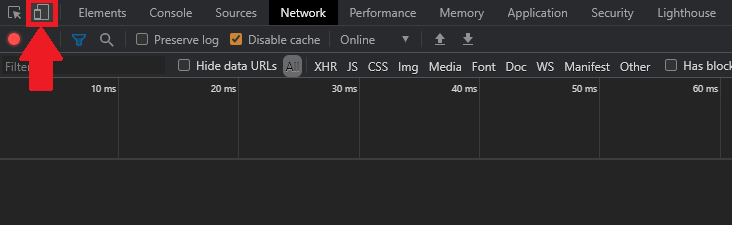
To start simulating devices, click on the 'Toggle device toolbar' button in the DevTools:
Change the simulated device to an iPad Pro:
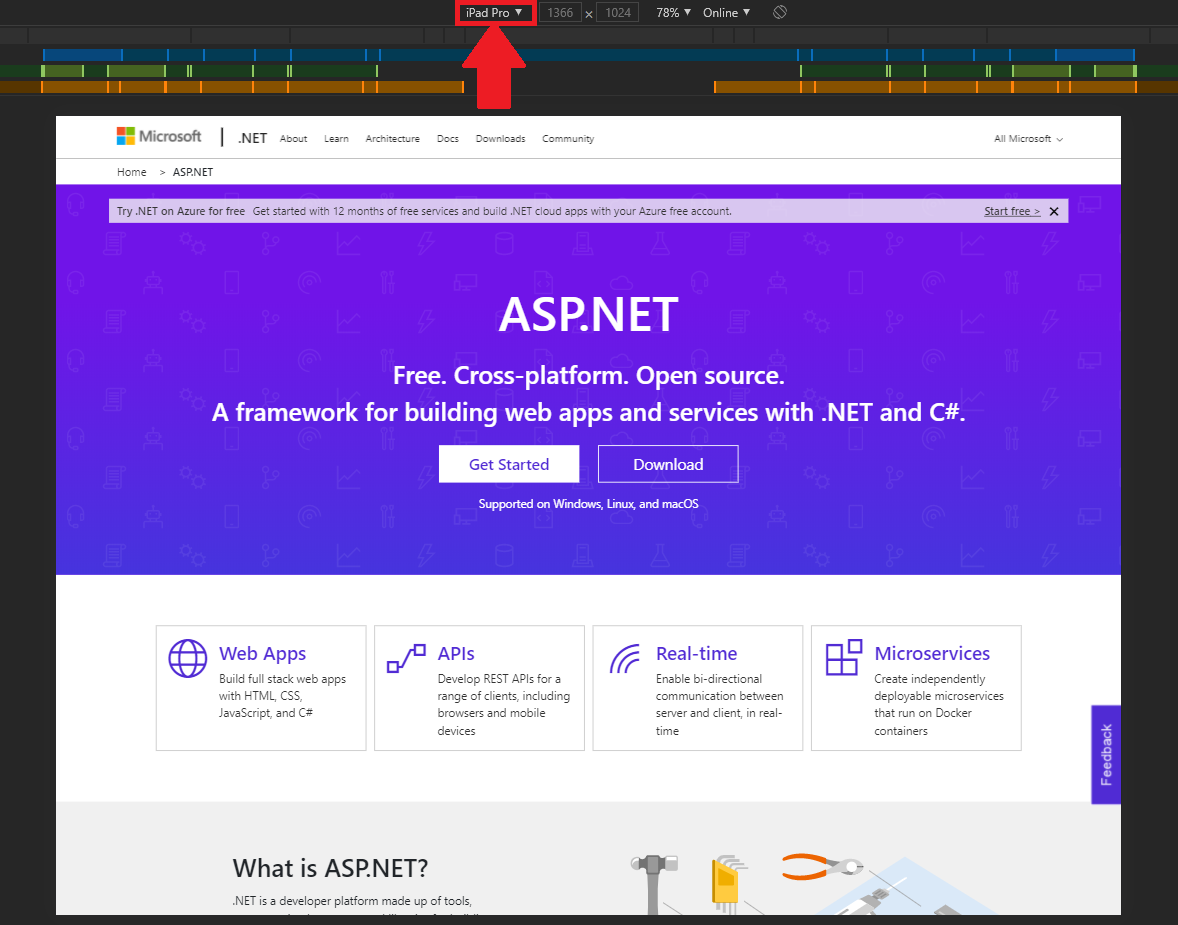
Now run a screenshot command and inspect the resolution of the screenshot. Even though the screen used in this tutorial is only 1920x1080 pixels, the screenshot taken while simulating iPad Pro is 2732x2048 pixels.

